Table of Contents
- Car Interior Detailing Tools List: What You Actually Need
- Step 1: Remove Trash, Debris, and Personal Belongings
- Step 2: Vacuum Carpets, Floor Mats, and Upholstery
- Step 3: Clean Car Interior Surfaces, Dashboard, Console, Vents, and Trim
- Best Practices for Cleaning Leather Car Seats
- How to Remove Stains from Car Upholstery
- How Long Does a Full Car Interior Detail Take
- Maintenance Schedule: Keeping Your Clean Car Interior Looking Professional
Last Updated: August 15, 2026
Car Interior Detailing Tools List: What You Actually Need
The right tools determine whether you get a showroom finish or a streaky, half-done result. At Clean Image 101, we’ve seen firsthand how the right equipment separates a genuine deep clean from a surface-level wipe-down.
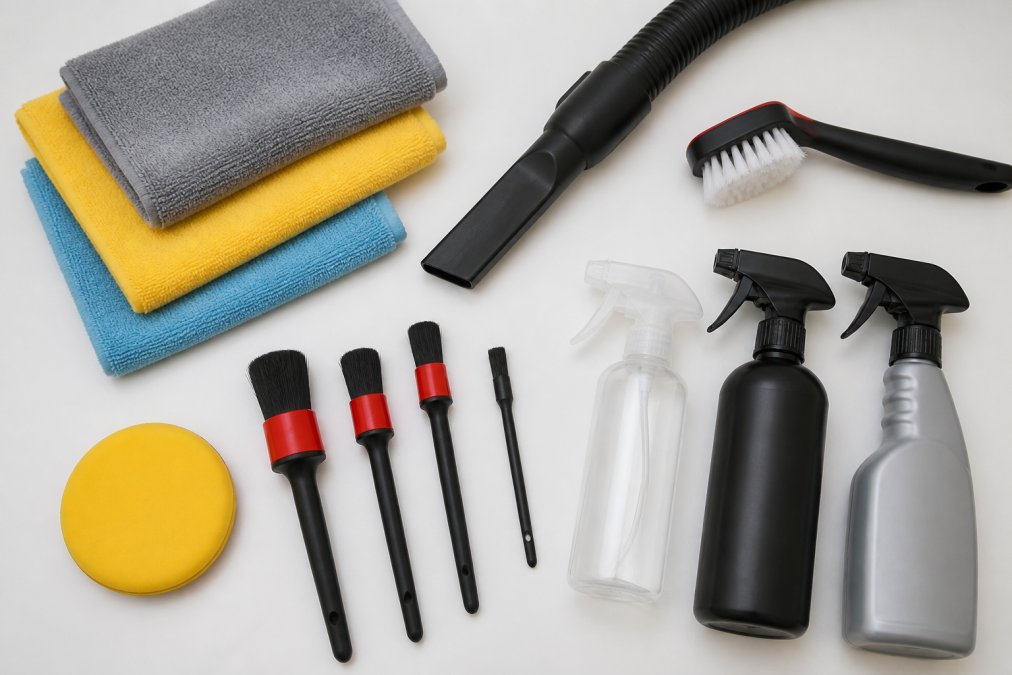
Must-Have Tools for a Deep Clean
A professional clean car interior requires more than a rag and a spray bottle:
| Tool | Purpose | Best For |
|---|---|---|
| Microfiber cloths (lint-free) | Wiping surfaces without scratching | Dashboard, trim, glass |
| Crevice vacuum attachment | Reaching tight gaps | Seats, console, door pockets |
| Upholstery brush | Agitating fabric fibers | Carpet, fabric seats |
| Detailing brushes (small) | Cleaning air vents and trim | Vents, buttons, seams |
| Steam cleaner | Disinfecting and loosening residue | Fabric, leather, hard surfaces |
| Glass cleaner (ammonia-free) | Streak-free interior glass | Windshield, side windows |
| Leather conditioner | Conditioning and protecting leather | Leather seats and trim |
| Vinyl protectant (non-greasy) | Surface protection without glare | Dashboard, door panels |
The steam cleaner is the one tool most DIY guides skip. It loosens baked-on debris, disinfects upholstery, and agitates grime from air vents without soaking surfaces.
Eco-Friendly and DIY Cleaning Solutions
Professional results don’t require harsh chemicals. Many effective cleaning solutions use ingredients you already have:
- All-purpose interior cleaner: Mix distilled water with a small amount of dish soap for most hard interior surfaces and door jambs.
- Upholstery spot cleaner: Combine equal parts white vinegar and water with a few drops of dish soap. Apply, agitate with an upholstery brush, then extract with a clean microfiber cloth.
- Glass cleaner: Distilled water and white vinegar in a 1:1 ratio cuts through haze and fingerprints without ammonia residue.
- Odor neutralizer: Sprinkle baking soda on carpets and fabric seats, let it sit for 15-20 minutes, then vacuum thoroughly.
According to the Environmental Protection Agency’s Safer Choice program, choosing cleaning products with safer ingredients reduces exposure to harmful chemicals inside enclosed spaces like vehicle cabins. Crack the windows when using any spray cleaner.
Step 1: Remove Trash, Debris, and Personal Belongings
Rushing past this step means vacuuming around obstacles and missing debris that ends up back on clean surfaces. Remove everything from the car: floor mats, seat pockets, cup holders, and personal belongings. Check under seats, in door pockets, and in the center console for loose coins, receipts, and food wrappers.
Shake out floor mats outdoors to dislodge loose debris before washing. Vacuuming mats while they’re still in the car just redistributes dirt onto the carpet beneath.
Before you vacuum a single surface, do a full sweep with a dry detailing brush to knock debris from air vents, seat seams, and console edges onto the floor. Then vacuum it all at once. It saves significant time and prevents re-contaminating surfaces you’ve already cleaned.
Step 2: Vacuum Carpets, Floor Mats, and Upholstery
Vacuuming extracts embedded dirt from carpet fibers and upholstery before any liquid cleaner touches the surface. Use a crevice tool along seat tracks, between seat cushions, and around the console base. Switch to an upholstery brush attachment for fabric seats and carpet to agitate fibers while suction extracts loosened dirt. Go over each area at least twice in different directions.
For floor mats, vacuum both sides before washing. Rubber mats can be scrubbed with a stiff brush and soapy water, then rinsed and dried completely. Fabric mats benefit from an upholstery cleaner: spray, agitate with a brush, and extract with a wet-dry vacuum or clean microfiber cloth. Never reinstall damp mats, as trapped moisture causes mold and odor.
Skipping the vacuum before applying any liquid cleaner is one of the most [common detailing mistakes](/top-5-mistakes-to-avoid-when-cleaning-your-car-interior/). Wet dirt turns into mud that spreads stains deeper into carpet and upholstery fibers. Always vacuum first, every time.
Step 3: Clean Car Interior Surfaces, Dashboard, Console, Vents, and Trim
Hard interior surfaces collect dust, fingerprints, and UV damage over time. Work top to bottom so falling debris doesn’t contaminate surfaces you’ve already cleaned.
Dashboard and Center Console
Start with a dry microfiber cloth to remove loose dust. Apply an all-purpose interior cleaner or diluted dish soap solution to a clean microfiber cloth, never spray directly onto the dashboard, which can send liquid into electronics. Wipe in sections, using a detailing brush around buttons, knobs, and screen edges. Follow with a dry lint-free cloth and finish with a non-greasy vinyl protectant to prevent cracking from UV exposure.
Air Vents, Door Jambs, and Hard-to-Reach Areas
A small detailing brush or foam paintbrush sweeps debris from each vent slat. Follow with a cotton swab dampened with all-purpose cleaner for stubborn buildup. Door jambs collect road grime and are almost always overlooked, wipe each jamb with a damp microfiber cloth and degreaser, then dry thoroughly. For hard-to-reach areas under seats, a steam cleaner with a narrow nozzle loosens residue without soaking the surface.
Interior Glass and Windows
Interior glass haze comes from off-gassing of plastics and vinyl. Use an ammonia-free glass cleaner applied to a lint-free microfiber cloth, not sprayed directly onto the glass. Work in small circular sections, then finish with a straight horizontal wipe to eliminate streaks.
As noted in guidance from the American Optometric Association on driving visibility, interior glass haze significantly reduces visibility in direct sunlight and at night.
Best Practices for Cleaning Leather Car Seats
Leather car seats require a different approach than fabric. Using all-purpose cleaners or harsh chemicals strips the leather’s natural oils and causes cracking over time.
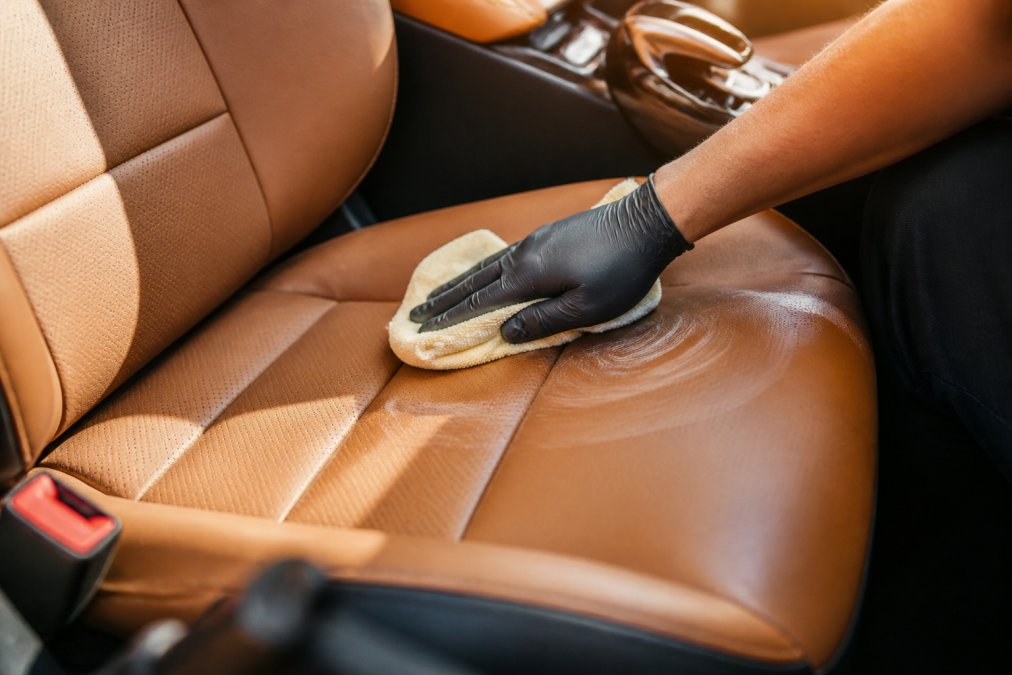
Cleaning leather car seats professionally involves three steps: clean, condition, and protect.
- Apply a dedicated leather cleaner to a soft microfiber cloth or upholstery brush. Work it into the leather in small sections using a gentle circular motion to agitate surface grime without scratching.
- Wipe away the cleaner with a clean, dry microfiber cloth.
- Apply leather conditioner with a foam applicator pad. Work it in evenly, then buff off any excess with a lint-free cloth. Conditioning prevents the leather from drying, cracking, and fading.
Perforated leather seats need extra care. Avoid saturating the surface with cleaner, which can seep into the perforations and cause mold beneath the seat cover. Use a barely-damp cloth and a soft detailing brush.
Leather conditioner is not optional maintenance. Leather that’s cleaned without conditioning dries out faster than leather that’s never cleaned at all. Condition every time you deep clean, and spot-condition high-wear areas like the driver’s seat bolster every few months.
How to Remove Stains from Car Upholstery
Stain removal works best when you treat it fast. The longer a stain sits, the deeper it bonds with the fibers. Blot, don’t rub. Work from the outside of the stain inward to prevent spreading.
Troubleshooting Common Stain Types
Coffee and dark liquid stains: Blot up as much liquid as possible immediately. Apply a mixture of dish soap, white vinegar, and warm water. Agitate gently with an upholstery brush, then extract with a clean microfiber cloth. Repeat until the stain lifts.
Book professional car care today →
Grease and food stains: Apply a small amount of degreaser or dish soap directly to the stain. Let it sit for two to three minutes to break down the grease, then agitate and extract. Avoid hot water, which can set grease stains.
Ink stains: Isopropyl alcohol on a cotton swab works for small ink spots. Dab carefully, working from the stain’s edge inward.
Mud and dirt: Let it dry completely first. Once dry, vacuum up the dried debris, then treat any remaining stain with your all-purpose upholstery cleaner.
Odor embedded in carpet or fabric: Baking soda is a reliable odor neutralizer. Sprinkle generously, let sit for 20-30 minutes, then vacuum thoroughly. For persistent odors, an enzymatic cleaner breaks down the organic compounds causing the smell.
According to guidance on indoor air quality and chemical exposure from the National Institute for Occupational Safety and Health, enclosed vehicle cabins can trap volatile compounds from cleaning products. Always ventilate the car after spot cleaning and allow surfaces to dry fully before driving.
How Long Does a Full Car Interior Detail Take
A full car interior detail takes between two and four hours for most standard vehicles. The actual time depends on the vehicle’s size, how long since the last clean, and which services are included.
| Stage | Time Estimate |
|---|---|
| Remove trash and belongings | 5-10 minutes |
| Vacuum carpets, mats, upholstery | 20-30 minutes |
| Clean dashboard, console, vents | 20-30 minutes |
| Clean and condition leather seats | 20-40 minutes |
| Stain removal (if needed) | 15-45 minutes |
| Interior glass cleaning | 10-15 minutes |
| Final wipe-down and inspection | 10-15 minutes |
| Total | 1.5-3 hours |
Larger vehicles like SUVs, minivans, and trucks add 30-60 minutes to most stages. A vehicle that hasn’t been detailed in over a year will also take longer. Rushing any stage costs more time overall, skipping a thorough vacuum before cleaning surfaces means re-cleaning.
Maintenance Schedule: Keeping Your Clean Car Interior Looking Professional
A professional detail is only as good as the maintenance routine that follows it. Without regular upkeep, a deep-cleaned interior returns to its previous state within weeks.
Weekly (5-10 minutes):
- Remove trash and loose items
- Wipe dashboard and center console with a dry microfiber cloth
- Spot-clean any fresh stains immediately
Monthly (20-30 minutes):
- Vacuum carpets, floor mats, and upholstery
- Wipe down all hard interior surfaces with an all-purpose cleaner
- Clean interior glass and windows
- Treat leather seats with a light conditioning wipe
Every 3-6 months (full detail, 2-4 hours):
- Full vacuuming including under seats and in all crevices
- Deep clean upholstery and carpets
- Clean and condition leather thoroughly
- Clean door jambs and air vents
- Apply vinyl protectant to dashboard and trim
- Inspect headliner for stains or sagging
The Car Care Council’s vehicle maintenance guidance recommends regular interior cleaning as part of overall vehicle upkeep, noting that neglected interiors can affect resale value and driver comfort over time.
A car used daily for commuting accumulates debris, odors, and surface wear faster than most owners account for. Keeping up with the weekly and monthly steps makes the full detail significantly faster and less expensive when it comes around.
Keep a small detailing kit in your trunk: two microfiber cloths, a travel-size all-purpose cleaner, and a small brush. Addressing spills and dust between full details takes minutes and prevents the kind of buildup that turns a two-hour detail into a four-hour job.
Maintaining a clean car interior at a professional standard takes the right tools, the right sequence, and consistent follow-through. For vehicle owners who want that result without spending hours doing it themselves, Clean Image 101 delivers professional mobile detailing directly to your location. Our team handles everything from deep vacuuming and upholstery stain removal to leather conditioning and interior glass cleaning, using professional-grade tools and techniques. Book professional car care today and let us bring the detail shop to you.
Frequently Asked Questions
What do professionals use to clean a car interior?
Professional detailers rely on a specific set of tools: a wet/dry vacuum with crevice and upholstery attachments, microfiber cloths, an upholstery brush, a steam cleaner for deep sanitizing, a dedicated glass cleaner, leather conditioner, vinyl protectant, and a non-greasy interior degreaser. The key difference from a basic wipe-down is using the right product for each surface, fabric, leather, vinyl, and glass each require a different approach to avoid residue or damage.
How often should you professionally detail your car interior?
For most drivers, a thorough interior detail every three to four months keeps the cabin in top condition. Vehicles used daily, those carrying children or pets, or cars used for professional purposes benefit from monthly maintenance cleans paired with a full quarterly deep clean. Between sessions, quick spot cleaning with a microfiber cloth and odor neutralizer extends the time between full details significantly.
How do I clean fabric car seats professionally?
Start by vacuuming thoroughly with an upholstery attachment to lift loose debris. Apply an upholstery cleaner or a DIY solution of warm water and a small amount of dish soap to the fabric, then agitate gently with an upholstery brush in circular motions. Blot, never rub, with a clean microfiber cloth to extract the solution. For stubborn stains, a portable steam cleaner can penetrate fibers without saturating the foam underneath.
Can I use Dawn dish soap to clean my car interior?
A diluted dish soap solution works on fabric upholstery and floor mats for general grime and some stains. However, avoid it on leather seats, dish soap strips natural oils and accelerates cracking over time. On dashboards and vinyl trim, it can leave a residue that attracts dust. For those surfaces, use a purpose-made interior cleaner or degreaser, then follow with a lint-free microfiber cloth to prevent streaking.
This article was written using GrandRanker