Welcome to Clean Image Mobile, we are a fully mobile car detailing service that brings professional auto care directly to you.

7 Best Ceramic Coating Brands for Cars

Table of Contents

Last Updated: September 25, 2026

What Is Ceramic Coating and Why It Matters

Ceramic coating is a liquid polymer that hardens into a protective glass-like layer, creating hydrophobic properties so water beads and rolls off rather than pooling. Unlike traditional wax, ceramic coatings bond at the molecular level with your paint, offering durability that extends months or even years depending on the product and application method.

The real value lies in what ceramic coating prevents. UV rays oxidize clear coat, swirl marks accumulate from improper washing, and contaminants embed themselves into paint. A ceramic coating acts as a sacrificial barrier, absorbing that damage so your paint doesn’t. For anyone investing in a vehicle’s appearance, whether it’s a luxury sports car or a daily commuter, ceramic coating represents one of the most effective paint protection strategies available.

This guide walks you through the seven best ceramic coating brands available, how they compare, and whether professional application or DIY makes sense for your situation.

Ceramic Coating vs Wax for Cars: Which Protects Better

Wax washes away over weeks or months, while ceramic coating chemically bonds to paint and lasts 2-5 years versus 3-6 months for wax, making it the superior long-term choice.

Ceramic coatings offer superior chemical resistance to bird droppings, tree sap, and road salt, with more pronounced hydrophobic properties than wax.

Wax is cheaper and easier to reapply, making it a practical interim solution if you’re uncertain about ceramic coating. For most owners wanting long-term protection, ceramic coating is the better investment, the initial cost is higher, but cost-per-month is lower than repeatedly applying wax.

Best Paint Prep for Ceramic Coating Application

Surface preparation determines whether your ceramic coating bonds properly or fails prematurely, it’s the most common DIY mistake and what separates professional results from disappointing ones.

Start with paint correction if your vehicle has visible swirl marks or scratches using machine polishing with progressively finer compounds. If your paint is already in good condition, skip to decontamination.

Decontamination removes embedded contaminants that washing cannot lift. Use isopropyl alcohol or clay bar treatment to strip away industrial fallout, overspray, and oxidation, this step is non-negotiable.

After decontamination, wipe the surface with a microfiber towel dampened with isopropyl alcohol and allow 30 minutes drying time. Apply ceramic coatings between 60-80°F with low humidity; cold or wet conditions prevent proper curing.

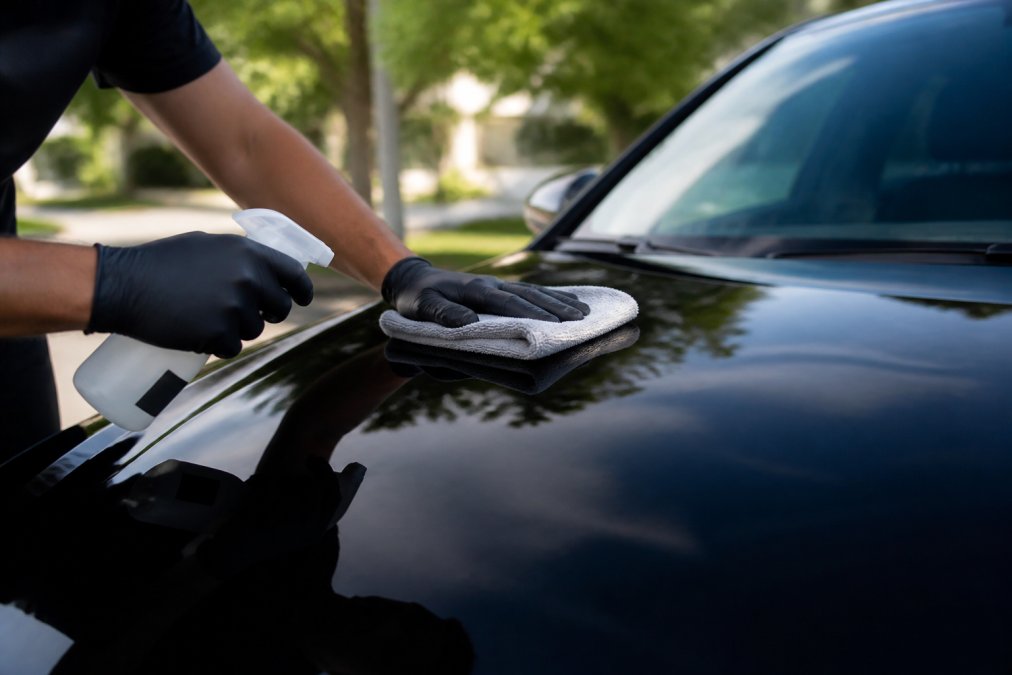
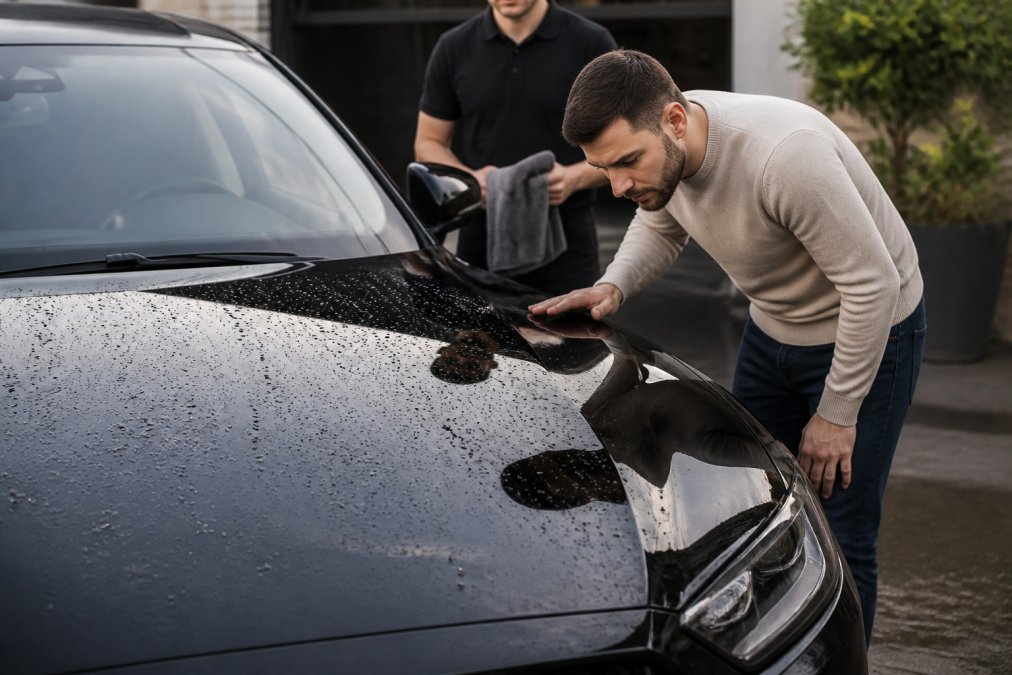
Professional detailer using microfiber towel and isopropyl alcohol on car's paint surface during decontamination prep, with natural daylight illuminating the work
Professional detailer using microfiber towel and isopropyl alcohol on car’s paint surface during decontamination prep, with natural daylight illuminating the work

Top 7 Ceramic Coating Brands Compared

1. Adam’s Polishes Graphene Ceramic Coating Advanced

Adam’s Polishes Graphene Ceramic Coating Advanced features a graphene-oxide infused formula delivering enhanced durability, exceptional water beading, and gloss enhancement for DIY enthusiasts seeking professional-grade results.

Application requires meticulous surface preparation and careful technique with a 60-90 second curing window per layer, demanding focus and patience.

Best For: Enthusiasts seeking professional-grade DIY protection with proven durability ratings.

Pros:

Cons:

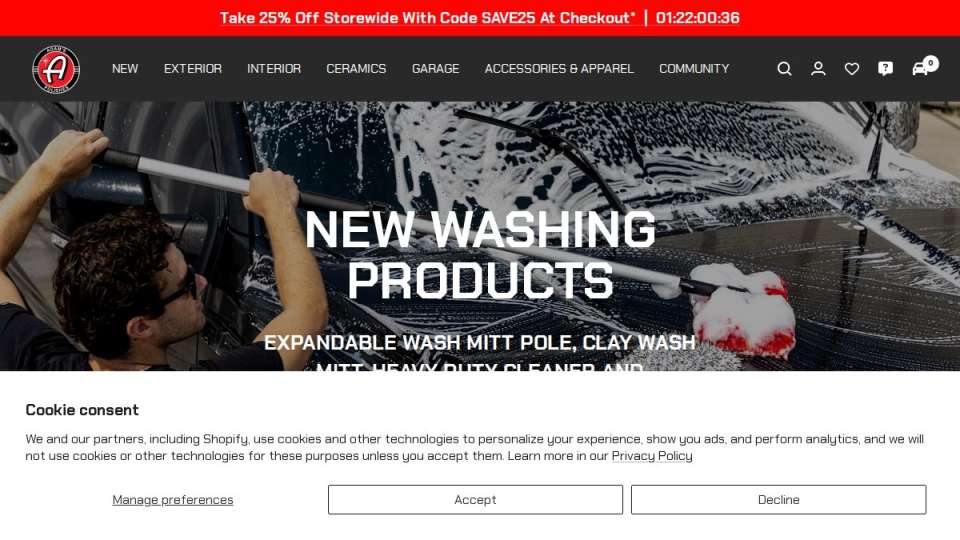
Screenshot of adamspolishes.com interface
Adam’s Polishes | Premium Car Care & Detailing Products

2. Chemical Guys Carbon Force

Chemical Guys Carbon Force is a professional-grade ceramic coating engineered for users prioritizing longevity and protection against harsh environments, road salt, and aggressive contaminants.

The formula bonds effectively with automotive clear coat and provides consistent results, though application demands attention to technique.

Best For: Users looking for top-tier, long-lasting protective layers with strong chemical resistance.

Pros:

Cons:

3. Cerakote Platinum Rapid Ceramic Paint Coating

Cerakote Platinum Rapid stands out for accessibility, designed for users wanting ceramic coating protection without a steep learning curve. The kit includes all prep materials, application tools, and instructions.

Application is straightforward: prep, apply with the included applicator, and cure. You can coat an entire vehicle in under two hours, with full hardness developing over 24-48 hours.

Book professional car care today →

Pros:

Cons:

Screenshot of cerakote.com interface
Cerakote.com – Global Leader in Thin-Film Ceramic Coatings | Cerakote

4. Gtechniq Crystal Serum Light

Gtechniq Crystal Serum Light is trusted by professional detailers for swirl mark resistance and high-gloss finish with professional-grade chemical bonding.

Pros:

Cons:

5. Turtle Wax Hybrid Solutions Ceramic Spray Coating

Turtle Wax Hybrid Solutions offers the easiest entry point to ceramic coating protection with spray-and-wipe application, eliminating applicators, flash time management, and buffing.

Pros:

Cons:

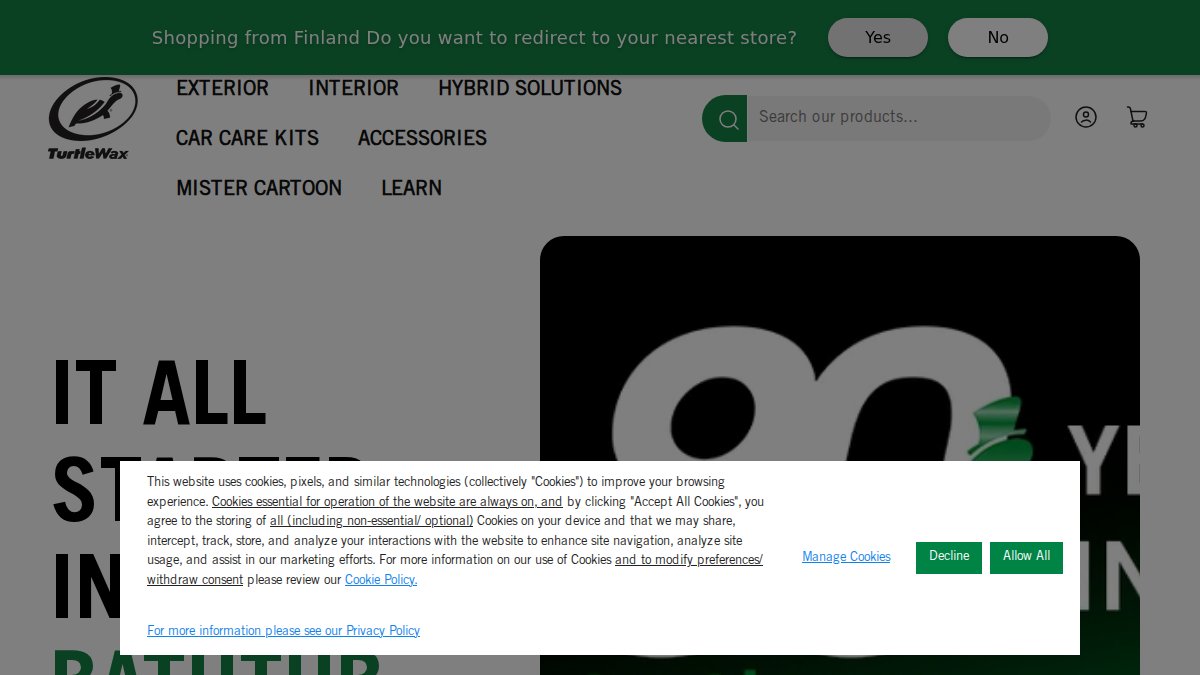
Screenshot of turtlewax.com interface
Turtlewax website

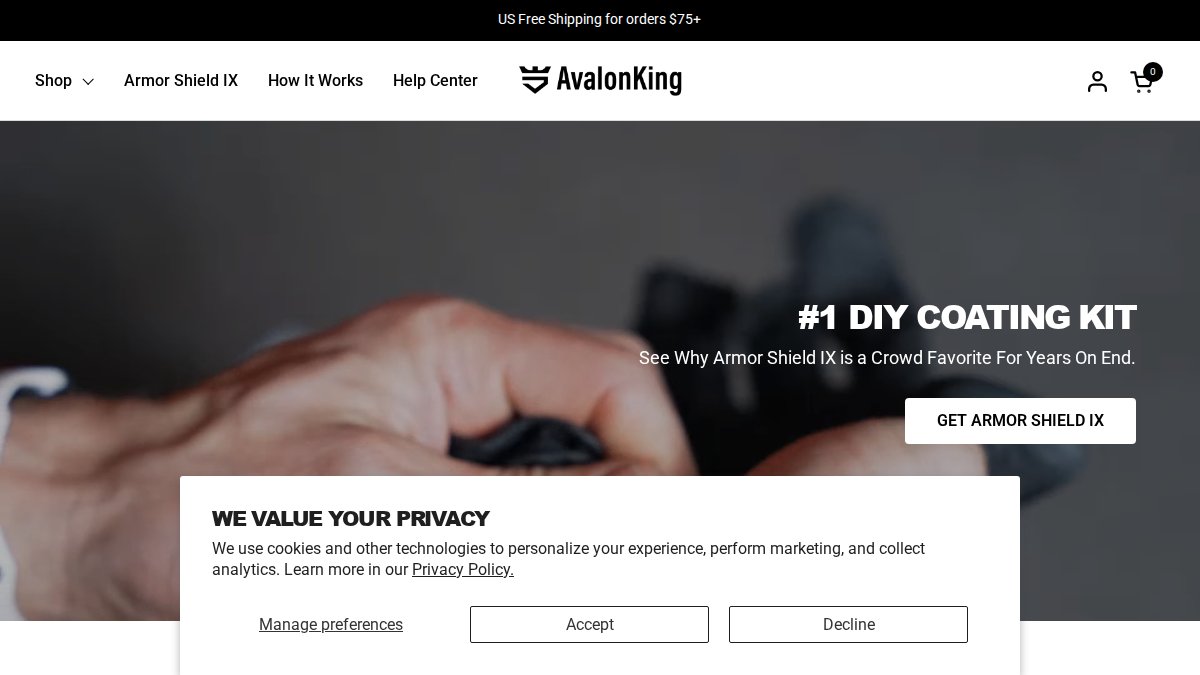
6. AvalonKing Armor Shield IX

AvalonKing Armor Shield IX delivers a comprehensive DIY kit with all components needed for ceramic coating application, including surface decontamination materials and a 9H hardness rating.

Pros:

Cons:

Screenshot of avalonking.com interface
Avalonking website

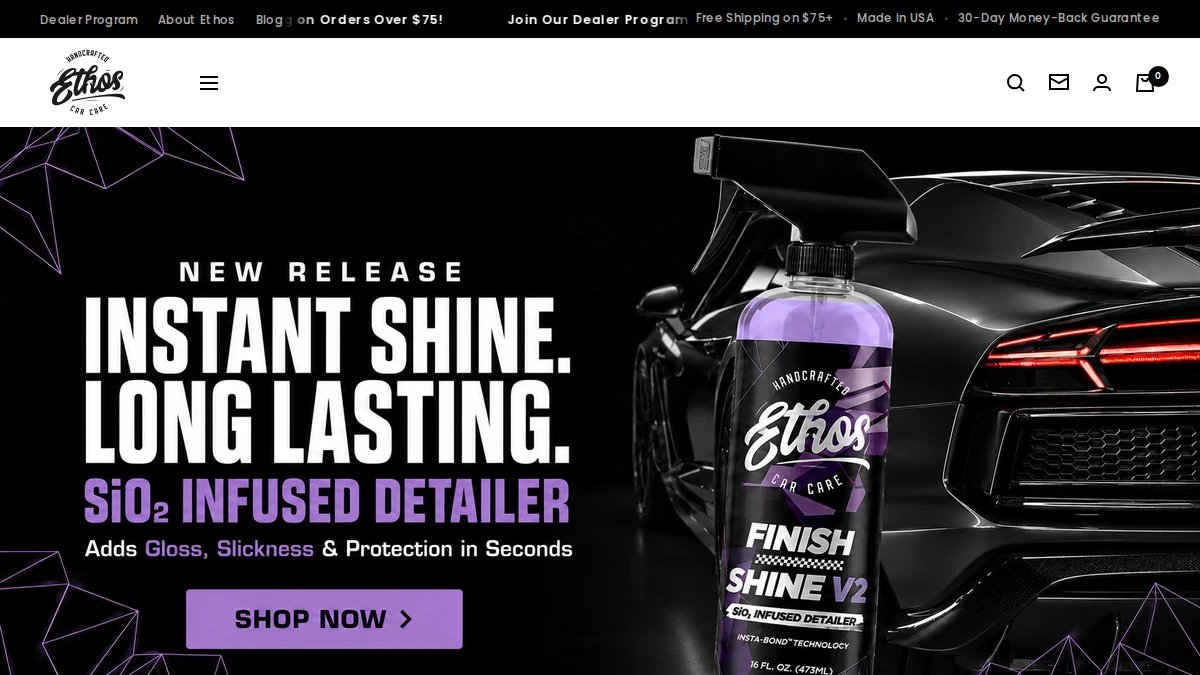
7. Ethos RESIST

Ethos RESIST is a mid-range ceramic coating offering strong hydrophobic properties and durable protection at competitive pricing, with a slick surface that enhances gloss.

Pros:

Cons:

Screenshot of ethoscarcare.com interface
Premium Auto Detailing Supplies, Ceramic Coatings, and Car Accessories | Ethos Car Care

How Long Does Ceramic Coating Last on Your Vehicle

Ceramic coating durability depends on product quality, application method, and maintenance. Budget spray coatings last 3-6 months; mid-range DIY kits provide 1-2 years; professional-grade coatings last 3-5 years or longer.

Professional vs. DIY Ceramic Coatings: What You Need to Know

Professional application costs significantly more than DIY products, but the results are often superior. Professional detailers have controlled environments, proper lighting, and years of technique refinement. They manage curing conditions, ensure surface preparation is thorough, and apply coatings with precision that reduces the risk of application errors.

Comparison Table: Features, Durability, and Price

Brand Starting Price Best For Durability Application Difficulty
Adam’s Graphene Advanced $99.99 Enthusiasts wanting professional-grade DIY 3-5 years High
Chemical Guys Carbon Force $149.99 Long-term protection seekers 3-5 years High
Cerakote Platinum Rapid $30.00 Budget-conscious beginners 1-2 years Low
Gtechniq Crystal Serum Light $85.00 Professional detailers and enthusiasts 3-5 years High
Turtle Wax Hybrid Spray $18.00 Quick maintenance and beginners 3-6 months Very Low
AvalonKing Armor Shield IX $60.00 DIYers wanting comprehensive kits 2-3 years Moderate
Ethos RESIST $26.00 Mid-range protection seekers 1-2 years Moderate

Common Mistakes to Avoid When Applying Ceramic Coating

The most common mistake is inadequate surface preparation. Rushing through decontamination or skipping paint correction entirely leads to coatings that fail prematurely or don’t adhere properly. Spend time on prep, it’s the foundation for everything that follows.


Frequently Asked Questions

What is the highest-rated ceramic coating brand for cars?

Chemical Guys Carbon Force and Gtechniq Crystal Serum Light rank highest among professional detailers for durability and chemical resistance. Chemical Guys offers extreme chemical resistance and a high-gloss finish, while Gtechniq is renowned for swirl mark resistance and professional-grade bonding. Your choice depends on whether you prioritize ease of application or maximum durability. For beginners, Adam’s Polishes Graphene Ceramic Coating Advanced provides excellent hydrophobic properties with a graphene-infused formula.

How long does ceramic coating last on a vehicle?

Professional-grade ceramic coatings typically last 2-5 years with proper maintenance, while budget-friendly spray coatings like Turtle Wax require reapplication every 3-6 months. Durability depends on the coating’s hardness rating, UV resistance, and how often you wash your car. Coatings with higher silica-based or graphene-infused formulas generally last longer. Regular maintenance washes with pH-neutral soap help extend the curing time benefits and maintain the hydrophobic beading effect throughout the coating’s lifespan.

Is ceramic coating worth the cost for daily drivers?

Yes, ceramic coating offers significant value for daily drivers by reducing maintenance time and protecting against water spots, oxidation, and contaminants. Budget options like Cerakote Platinum or Ethos RESIST provide affordable entry points, while professional-grade coatings justify higher costs through longer durability and superior chemical resistance. Daily drivers benefit from the hydrophobic properties that make washing easier and reduce the need for frequent waxing, saving both time and money over the coating’s lifespan.

What is the best ceramic coating for paint protection and longevity?

Chemical Guys Carbon Force and AvalonKing Armor Shield IX offer the best balance of protection and longevity. Chemical Guys excels in chemical resistance and gloss enhancement, while AvalonKing’s 9H hardness rating provides exceptional durability against swirl marks and UV damage. Both require thorough surface decontamination and proper application technique. For maximum longevity, professional installation of Gtechniq Crystal Serum Light by experienced detailers ensures optimal bonding and flash time, extending protection to 5 years or more.

Do I need professional installation for ceramic coating, or can I apply it myself?

DIY application is possible with the right products and preparation. Cerakote Platinum, Turtle Wax Hybrid, and AvalonKing Armor Shield IX are designed for consumer application and include necessary prep materials. Success requires meticulous surface preparation including paint correction, clay bar treatment, and isopropyl alcohol cleaning to remove contaminants. Professional installation guarantees proper curing time, flash time management, and layering technique, making it ideal for luxury vehicles or those seeking maximum durability without the risk of application errors.

How to Clean Leather Car Seats Without Damage

Table of Contents

Last Updated: September 16, 2026

What You’ll Need Before You Start

Learning how to clean leather car seats without damaging them starts with preparation, not product. Gather the right tools first, and you avoid the rushed scrubbing that causes most damage. This guide walks through the full process, from vacuuming to conditioning, so your seats stay supple instead of cracked.

Tools and Materials Checklist

Skip abrasive pads, paper towels, and household all-purpose sprays. Each one scratches or dries the surface.

Pro Tip
Test your vacuum’s brush attachment on a low setting first. A stiff bristle head can leave swirl marks on finished leather that only show up in direct sunlight.

Step 1: Vacuum and Prep Your Leather Car Seats

Vacuuming removes loose grime before any liquid touches the surface. If you skip this, you grind dirt into the grain when you wipe.

Using the Right Vacuum Attachments

Use the soft brush attachment for flat surfaces and the crevice tool for the gaps between the cushion and the seat back. Keep the brush moving. Holding it in one spot on a seam can pull at the stitching.

Step 2: Spot Test in an Inconspicuous Area

A spot test tells you how your leather reacts to a cleaner before you commit to the whole seat. Apply a small amount of cleaner to a hidden area, like under the seat or on the side bolster, and wait a minute.

Watch Out
Never test a new cleaner on a visible cushion first. Some cleaners lift dye from older or re-dyed leather within seconds, and that discoloration is permanent.

Step 3: Choose the Best Leather Cleaner for Car Seats

The right cleaner depends on what your seats are actually made of, not on the label that says “leather.” Automotive interiors use at least four finishes, and each one reacts differently to water, solvents, and surfactants. Picking the wrong chemistry is the fastest way to strip a top-coat, lift dye, or leave a sticky residue that attracts dust.

Identify Your Leather Type First

Before you buy anything, figure out which of these you have:

Match the Cleaner to the Finish

Leather type Safe cleaner Avoid
Coated genuine pH-balanced automotive leather cleaner Ammonia, alcohol, degreasers, all-purpose sprays
Semi-aniline / aniline Dedicated mild leather cleaner, diluted if directed Vinegar, baking soda paste, any solvent
Perforated (any base) pH-balanced cleaner applied to cloth only Spraying directly at the holes, soaking the surface
Synthetic / vinyl Mild soap and water or a vinyl-safe cleaner Alcohol, acetone, abrasive pads, oil-based conditioners

What to Look For on the Label

Skip marketing claims and read the ingredient panel. A cleaner suited to coated automotive leather will typically list water as the first ingredient, use a mild non-ionic surfactant, and carry a pH close to neutral. If the label leads with solvents, petroleum distillates, or butyl-based degreasers, it is meant for engine bays and carpet, not finished hides.

DIY Options and Their Limits

Pro Tip
If you cannot identify your leather type, default to the mildest option: a pH-balanced cleaner applied to a microfiber cloth, worked in small sections, and rinsed with distilled water. Gentleness is reversible; a stripped top-coat is not.

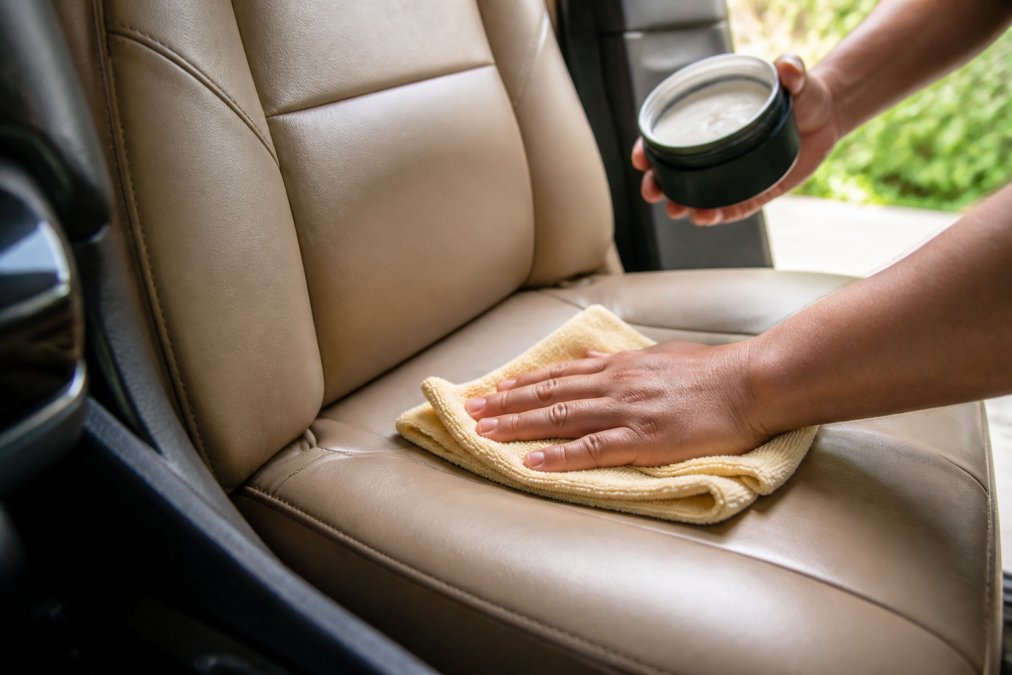
Apply cleaner to your microfiber cloth, not directly to the seat. Work in small sections, use gentle circular motion, and wipe away residue with a clean damp cloth. Buff dry so no moisture sits in the seams.

Step 4: How to Condition Leather Car Seats After Cleaning

Conditioning is the step that keeps leather supple and slows cracking. Clean first, then condition. Conditioning over dirt traps grime against the surface.

Step-by-step process of applying conditioner to clean leather car seats using a microfiber cloth

Common Mistakes When Cleaning Leather That Cause Damage

Most leather damage comes from a handful of repeat errors:

Book professional car care today →

Perforated and Synthetic Leather: Special Considerations

Perforated leather needs a lighter touch. Liquid pushed into the holes soaks the backing and can cause odor or separation. Use a barely damp cloth and avoid spraying cleaner directly at the perforations.

Key Takeaway
The type of leather decides your method. Perforated and synthetic seats need less liquid and milder products than smooth, coated genuine leather.

How to Maintain Clean Leather Car Seats Long-Term

Maintenance is where leather either lasts a decade or starts cracking in year three. Cleaning removes soil; protection is what keeps the top-coat from breaking down between cleanings. Most guides stop at “wipe it down and condition it,” which leaves the two biggest long-term threats unaddressed: UV radiation and plasticizer migration. These same chemical vulnerabilities extend to other high-quality hides, making the principles found in this leather care guide essential for preserving the integrity of any luxury material exposed to the elements.

Why Leather Fails Over Time

Automotive leather is a hide covered with a thin polymer top-coat and a layer of plasticizers that keep it flexible. Two things destroy that system:

A Realistic Maintenance Cadence

Interval Task
Weekly Dry microfiber wipe-down to lift dust before it works into the grain
Monthly Damp wipe with distilled water on high-touch areas: driver’s bolster, armrest, steering wheel-adjacent trim
Every 3-4 months Full clean and condition (coated leather)
Every 2-3 months Full clean and condition in hot, sunny climates or if the car sits outside
Twice a year Apply a UV-blocking leather protectant after conditioning

Adjust the deep-clean interval based on use. Rideshare drivers, pet owners, and anyone eating in the car should treat monthly as the baseline.

Post-Cleaning Protection: The Step Most Guides Skip

Conditioner restores suppleness. A protectant creates a sacrificial layer that absorbs UV and blocks some airborne contaminants before they reach the top-coat. Look for a product labeled as a leather sealant or UV protectant, not a conditioner, they are different products with different jobs.

Watch Out
Do not apply a protectant to perforated leather by spraying it at the surface. The product will pool in the ventilation holes and wick into the foam. Spray the cloth, then wipe.

Habits That Actually Extend Leather Life

When to Bring In a Professional

If your seats are aniline or semi-aniline, heavily soiled, or showing dye transfer from dark denim, the risk of making it worse with a DIY attempt is real. Professional mobile detailing handles the full cycle, vacuuming, spot testing, pH-matched cleaning, conditioning, and UV protection, with products selected for your specific leather type. Clean Image 101 brings professional, passionate mobile car wash and auto detailing services directly to your Southern California doorstep, transforming vehicles of all types, from sports cars to minivans, into masterpieces.

Frequently Asked Questions

Can I use Dawn dish soap on my leather car seats?

Dawn and similar dish soaps strip natural oils from leather, leaving it dry and prone to cracking. They are not pH-balanced for leather and can damage the top-coat over time. Use a dedicated leather cleaner or a mild saddle soap instead. If you must use a DIY option, mix a few drops of mild soap with distilled water and follow with a conditioner.

What do professional car detailers use to clean leather seats?

Detailers typically use pH-balanced leather cleaners applied with a soft-bristled brush or microfiber cloth. They vacuum first with a crevice tool, spot test in an inconspicuous area, and always follow with a leather conditioner to restore moisture. For stubborn stains, they use specialized products rather than harsh household cleaners that can damage the grain or stitching.

How often should you condition leather car seats?

Condition leather car seats every two to three months for daily-driven vehicles, or more often in dry climates. Conditioning restores oils that cleaning removes and helps prevent cracking and fading. If your seats feel dry or look dull, condition sooner. Always clean before conditioning so the product absorbs properly rather than sitting on top of grime.

What is the best way to remove stains from leather car seats?

Identify the stain type first. For oil-based stains, use a small amount of pH-balanced cleaner on a microfiber cloth and blot gently. For water-based stains, distilled water with a drop of mild soap often works. Avoid scrubbing aggressively, which can damage the grain. For tough stains, consult a professional detailer who can assess whether the leather is porous or coated.

How to Maintain Ceramic Coating Shine: 2026 Guide

Table of Contents

Last Updated: September 15, 2026

Why Ceramic Coating Shine Fades (and How to Stop It)

Ceramic coating shine fades because the same contaminants that dull bare paint eventually bond to the coating itself. Road film, mineral deposits, and industrial fallout block light reflection. A coated car stays glossy only because someone removes those contaminants before they etch in.

That distinction matters more than most owners realize. A ceramic coating is a semi-permanent layer of silica-based protection that cross-links to your clear coat and gives it hydrophobic properties. It resists UV damage, chemical staining, and water spotting far better than wax. What it does not do is repel dirt forever. According to guidance from the U.S. Environmental Protection Agency on vehicle washing and runoff, how and where you wash affects both your finish and local water quality, which is one reason touchless and rinseless methods have grown in popularity.

A common pattern across Southern California is a coating that looked incredible at installation turning flat within a year because the owner switched to an automated car wash. Below is the wash, dry, and boost routine that keeps ceramic coating shine intact.

Key Takeaway
Ceramic coating shine is a maintenance outcome, not a permanent property. Protect the top layer and the gloss stays; neglect it and the coating becomes a dirt magnet that looks worse than bare paint.

How to Wash a Ceramic Coated Car Without Killing the Gloss

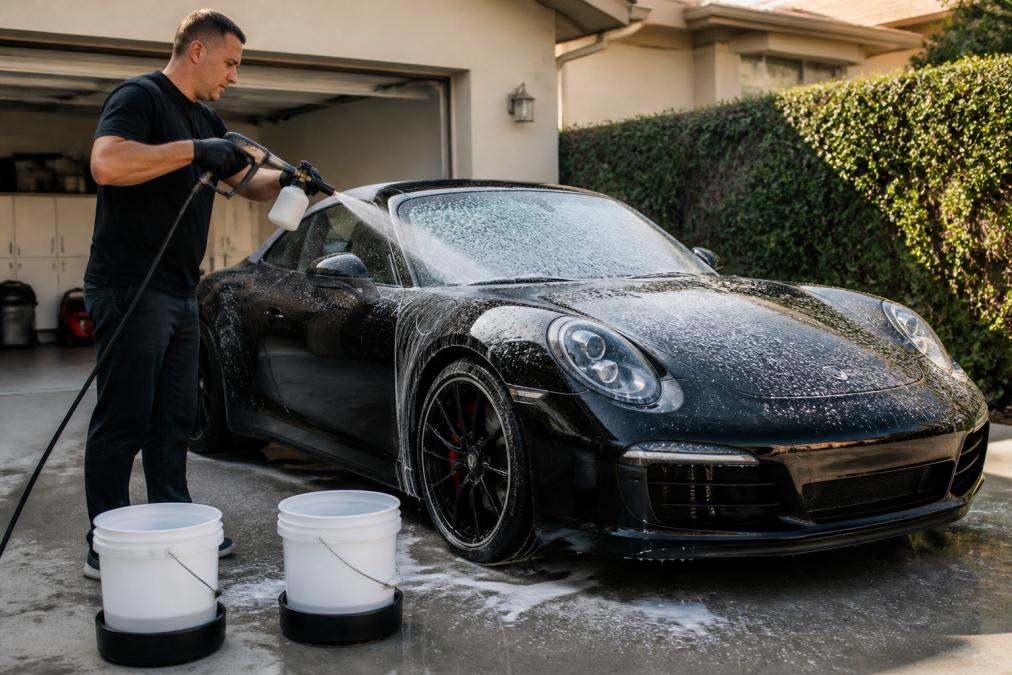
Wash a ceramic coated car with a pH neutral shampoo, a pre-wash foam stage, and the two-bucket method using grit guards. Skip the automated car wash entirely. Those spinning brushes and harsh alkaline detergents strip the hydrophobic layer and leave swirl marks that no coating can hide.

A person wearing microfiber gloves using a foam cannon to pre-wash a glossy black sports car in a driveway, with two buckets visible on the ground and water beading on the paint surface

Work in shade on a cool surface, and never let soap dry on the paint. A pressure washer at a safe distance lifts road grime before your wash mitt touches the surface, the biggest factor in avoiding scratches. Keep the nozzle at least 12 inches from the paint and stay off panel edges and trim, where high pressure can lift a coating at a chip or seam.

The Pre-Wash Stage: Let Chemistry Do the Work

The pre-wash is the step most owners skip, and it protects the coating most. Foam the entire vehicle with a foam cannon or pump sprayer, then let it dwell three to five minutes. The surfactant lifts and suspends road film so it rinses away before any contact. If the foam dries, re-wet the panel and rinse immediately.

For a coated car, a touchless pre-wash does more than a mitt ever will. Every square inch you remove without touching the paint is a square inch that cannot be scratched.

The Two-Bucket Method and Grit Guards

The two-bucket method uses one bucket for clean shampoo solution and one for rinsing your wash mitt. A grit guard at the bottom of each bucket traps dislodged dirt so it cannot climb back onto your mitt. Dip, wash one panel, rinse the mitt in the dirty bucket, reload from the clean bucket, repeat.

A few mechanics that separate a real two-bucket wash from a pretend one:

This sounds fussy until you see what a single-bucket wash does to a black hood in direct sun. Every pass drags grit across the clear coat. Coated or not, that creates fine scratches.

Drying Techniques That Prevent Water Spots

Water spots form when mineral-heavy water evaporates and leaves calcium and magnesium behind (Hardness of Water). Those deposits etch into a coating faster than into bare paint because the coating holds them against the surface.

Dry with a plush microfiber towel and a drying aid. Never air-dry a coated car, and never use a squeegee, which drags trapped grit across the paint.

Book professional car care today →

Pro Tip
If your water is hard, a rinse with filtered or deionized water before drying eliminates most spotting risk. For apartment dwellers without a hose, a rinseless wash uses a fraction of the water and still respects the coating, see the maintenance section below.

What to Skip Entirely

Automated car washes with brushes are the fastest way to dull a coating. Touchless washes are gentler but rely on strong alkaline detergents that degrade the silica matrix over time. If you must use one, choose a pH neutral option and follow it with a booster spray. Dish soap, degreasers, and acidic wheel cleaners belong nowhere near a coated finish.

Best Car Wash Soap for Ceramic Coating: What to Look For

The best car wash soap for ceramic coating is a pH neutral, surfactant-rich formula with no waxes, gloss enhancers, or degreasers. Read the label for “pH neutral” and “coating safe” rather than trusting a picture of a shiny car.

Three things decide whether a soap belongs in your bucket:

Watch Out
Dish soap is the most common mistake we see. It strips the hydrophobic top layer, and repeated use dulls ceramic coating shine within months. Save it for your dishes.

Ceramic Coating Maintenance Spray: When and How to Apply

A ceramic coating maintenance spray, often called a ceramic booster or silica-based spray, restores slickness and gloss between full washes. Apply it every four to six weeks, or whenever water stops beading tightly.

Wash and dry the car first. Mist the booster onto a microfiber towel, not directly onto hot paint, and wipe one panel at a time.

Can You Wax Over Ceramic Coating? What Actually Works

Product Type Safe Over Coating Typical Longevity Effect on Shine
pH neutral shampoo Yes Per wash Maintains
Silica-based spray booster Yes 4-8 weeks Restores
Ceramic topper Yes 3-6 months Enhances
Carnauba wax No 2-4 weeks Mutes

Winter Maintenance and Troubleshooting Common Coating Failures

A winter routine that protects the coating:

Watch Out
Do not use a de-icer spray or an ice-melt product on your paint. Many contain chlorides and glycols that stain trim and degrade the coating. Melt ice with warm water or let the defroster do the work.

Is the Coating Failing, or Is It Just Dirty?

The Maintenance Schedule That Actually Works

Pro Tip
For apartment dwellers without a hose, a rinseless wash uses a fraction of the water and still respects the coating. Soak a microfiber towel in the rinseless solution, wipe one panel at a time, and dry immediately. It is the closest thing to a full wash without a driveway, and it works in a parking garage or a self-serve bay.

What Is Safe to Use on a Coating

Not every chemical belongs on a coated surface:

Conclusion

Frequently Asked Questions

How often should I apply a ceramic coating maintenance spray?

Apply a ceramic booster or silica-based spray every 4 to 8 weeks, depending on how often you drive and the climate. If you park outside or deal with road grime daily, stick to the shorter end. The spray restores hydrophobic properties and gloss enhancement between full washes. Look for water beading as your cue: when it weakens, it is time to reapply. Always apply to a clean, dry surface for even coverage.

Can I wax over ceramic coating to boost shine?

You can, but you will not get the results you expect. Wax sits on top of the coating and temporarily adds gloss, but it blocks the coating’s hydrophobic properties and attracts dust. Worse, most waxes contain solvents that degrade the ceramic layer over time. A dedicated ceramic coating maintenance spray gives you the same gloss enhancement without interfering with the coating’s chemical resistance or UV protection.

What is the best way to wash a ceramic coated car?

Start with a pre-wash foam to loosen road grime, then use the two-bucket method with a pH neutral shampoo and grit guard. Wash from the top down with a microfiber towel or wash mitt, rinsing frequently. Dry with a plush microfiber towel or a drying aid to prevent water spots. Avoid automated car washes entirely because the brushes cause swirl marks that dull the coating’s shine and can scratch the surface.

What products should I avoid on ceramic coated paint?

Skip solvent-based cleaners, abrasive polishes, and any wash that contains wax or silicone. These strip the coating or leave a film that masks its hydrophobic properties. Also avoid dish soap, which is too harsh, and automated car wash chemicals that are often acidic. Stick to pH neutral shampoo, iron fallout remover for decontamination, and silica-based spray boosters. If a product is not labeled coating-safe, leave it on the shelf.

Is Ceramic Coating Worth the Cost? 2026 Review

Table of Contents

Last Updated: September 14, 2026

What Ceramic Coating Actually Does (and What It Doesn’t)

Ceramic coating is a liquid polymer applied to a vehicle’s clear coat that chemically bonds to the paint and forms a semi-permanent protective layer. This layer delivers hydrophobic properties, UV resistance, and easier cleaning, but it is not armor against rock chips or deep scratches. Understanding that distinction is the first step in deciding is ceramic coating worth the cost.

The Science of Protection: Hydrophobic Properties and UV Resistance

The coating’s silica-based chemistry lowers surface tension, so water beads and rolls off instead of pooling. That self-cleaning effect also resists chemical etching from bird droppings and road grime, while UV resistance slows paint oxidation and fading. What it does not do is stop physical damage: a shopping cart or gravel truck will still mar the surface, because ceramic coating is a sacrificial layer, not a shield.

Ceramic Coating vs Wax for Cars: Which Protection Wins?

Ceramic coating vs wax for cars comes down to durability, not chemistry. Wax is a natural or synthetic paste that typically lasts weeks to a few months, while a properly applied coating can hold for a year or more. Both add gloss enhancement and water beading, but only the coating resists chemical etching and UV exposure long enough to matter for a daily driver.

Durability, Gloss Enhancement, and Maintenance Wash Differences

Wax rewards frequent reapplication; coating rewards careful maintenance. A coated car needs a pH-neutral maintenance wash and occasional decontamination, not monthly waxing. Skip that routine and the coating clogs, water beading fades, and you’re back to square one. Wax, by contrast, forgives neglect because you simply reapply it.

Professional Ceramic Coating Cost: What Drives the Price

Professional ceramic coating cost is driven by labor, not the bottle. Most of the ticket is paint correction labor, surface preparation, and the coating tier you choose. A daily driver with light swirl marks needs less correction than a neglected finish with heavy paint oxidation, and that difference shows up in the quote.

Paint Correction Labor, Surface Preparation, and Coating Tiers

Surface preparation is the make-or-break step. Detailers decontaminate with a clay bar treatment, measure paint depth, and polish out swirl marks before any coating touches the surface. Coating tiers range from entry-level consumer formulas to multi-layer professional-grade systems, and each tier adds cost. The upfront investment is real, but it covers hours of skilled labor, not just product.

Pro Tip
Ask any installer what paint correction they include before quoting a price. A quote that skips correction is a coating that will fail early.

How Long Does Ceramic Coating Last?

How long does ceramic coating last depends on four variables: the product tier, the quality of surface preparation, the curing environment, and how the car is washed afterward. A consumer-grade spray or wipe-on coating may hold for six months to a year (pubmed.ncbi.nlm.nih.gov). A pro-grade multi-layer system applied over corrected paint commonly lasts two to five years, and some manufacturer-backed systems advertise longer terms when the owner follows a registered maintenance schedule.

Curing Time and the First Two Weeks

Curing is not a single event. After application, the coating needs roughly 12 to 24 hours of dry, dust-free conditions to set, then continues to cross-link over the following week. During that window, avoid water, avoid washing, and avoid parking under trees or near sprinklers. A coating that gets wet too early can develop streaks, hazing, or uneven hydrophobic patches that never fully resolve.

Real-World Failure Scenarios (and What They Actually Look Like)

Most coating failures are not product failures, they are process failures. The patterns show up again and again:

What Voids Coverage

Most professional installers and coating manufacturers tie their durability claims to a maintenance requirement. Skipping the annual inspection, using a car wash that is not approved, or applying a wax or sealant on top of the coating can void the warranty. Read the terms before you buy, the number on the bottle is conditional, not guaranteed.

Watch Out
A coating that fails in month three is almost always a prep problem, not a product problem. Ask your installer what paint correction and decontamination steps are included before you compare prices.

Longevity by Product Tier

Tier Typical Real-World Life Notes
Consumer spray/wipe-on 6-12 months Easy to apply, forgiving, short-lived
Consumer-grade bottle coating 1-2 years Requires careful prep and curing
Pro-grade single layer 2-3 years Installed over corrected paint
Pro-grade multi-layer system 3-5+ years Warranty tied to maintenance schedule

manufacturer warranty terms and maintenance requirements

DIY vs Professional Application: Where the Value Splits

DIY kits cost far less than professional service, but the value split is labor and risk. DIY application suits enthusiasts willing to invest hours in surface preparation, paint correction, and careful curing. Professional application suits owners who want consistent results and warranty backing without the learning curve. The coating is only as good as the surface underneath it.

Watch Out
Applying a coating over a swirled or contaminated finish locks in every defect. You’ll pay twice: once for the coating, again for correction to fix it.

Ceramic Coating vs Paint Protection Film: Different Jobs, Different Costs

Ceramic coating vs paint protection film is not an either-or decision. PPF is a thick urethane film that absorbs rock chips and deep scratches; ceramic coating is a thin chemical layer that resists UV, chemicals, and grime. PPF protects against physical impact, coating protects against environmental damage. Many owners combine both: film on impact zones, coating everywhere else.

Protection Type Best Against Typical Longevity Relative Cost
Ceramic coating UV, chemicals, grime 1-5 years Moderate
Paint protection film Rock chips, scratches 5-10 years Higher
Wax Minor grime, light UV Weeks to months Lowest

Decision Matrix: Is Ceramic Coating Worth It for Your Vehicle?

Is ceramic coating worth the cost? The honest answer is that it depends on three inputs most guides ignore: how long you will keep the car, how the car is stored, and how much you drive. Use the framework below instead of a generic pros-and-cons list.

The Three Questions That Decide It

  1. Ownership horizon. If you plan to sell or trade within two years, the upfront cost rarely pays back in resale. If you are keeping the car five years or more, the math shifts in favor of coating.
  2. Storage. A garage-kept car sees far less UV, fallout, and bird dropping exposure. A car parked outside 24/7 will degrade any coating faster and needs the protection more.
  3. Annual mileage and driving environment. Highway commuters face rock chips (a coating will not stop those, that is PPF territory). City drivers face more brake dust, tree sap, and door-ding risk. Coastal and industrial areas add salt and chemical fallout.

Vehicle Age and Condition Matrix

Vehicle Profile Coating Worth It? Why
New car (under 2 years), keeping 5+ years, garage-kept Yes Preserves factory paint, easiest upkeep, best resale story
New car, leasing, returning in 2-3 years Usually no You will not recoup the cost; lease terms rarely reward it
3-7 year old car, good paint, daily driver Yes, if paint is corrected first Coating locks in the corrected finish and cuts wash time
3-7 year old car, moderate swirls and chips Maybe Budget for paint correction first; the coating alone will not hide defects
8+ year old car, faded or peeling clear coat No Fix the paint or skip the coating; a coating over failing clear coat will fail with it
Enthusiast or weekend car, garage-kept Yes Gloss enhancement and easier detailing are the real payoff
Work truck or off-road vehicle Depends PPF on impact zones matters more than coating on the whole body

Resale Value: What Actually Happens

A coating does not add a fixed dollar amount to resale. What it does is make the paint easier to keep in top condition, which can help at trade-in or private sale time. Buyers pay for clean, defect-free paint, not for the coating receipt. If the coating is documented with a warranty card and maintenance records, it can be a talking point. Without documentation, it is invisible to the next owner.

Insurance and Warranty Implications

Most auto policies do not list aftermarket coatings as a separate covered item (naic.org). Some insurers will cover the coating under comprehensive coverage if it was damaged in a covered event, but many will not. Call your insurer before assuming you are protected, and ask specifically whether aftermarket paint protection is included or excluded.

On the factory side, a properly applied coating does not void your paint warranty, but improper prep, wet sanding, or aggressive polishing by an installer can. Keep records of who did the work and what products were used.

Key Takeaway
The strongest case for ceramic coating is a newer vehicle you plan to keep, stored with care, and washed correctly. The weakest case is an older car with uncorrected paint, a short ownership horizon, or a habit of tunnel washes.
A car owner inspecting the glossy, water-beading finish on a dark vehicle hood after a ceramic coating application, with a professional detailer nearby holding a microfiber towel

Frequently Asked Questions

What is the downside of ceramic coating?

The main downsides are the upfront cost and the required surface preparation. A professional ceramic coating cost includes paint correction labor, which can push total pricing into the thousands. It also does not prevent rock chips or deep scratches, and without proper maintenance washes, the hydrophobic properties degrade faster. If you skip decontamination and clay bar treatment before application, the coating may fail prematurely. It is a sacrificial layer, not a force field.

How much does a 7-year ceramic coating cost?

Pricing for a 7-year professional ceramic coating depends on vehicle size, paint condition, and the number of layers applied. Most professional-grade packages require paint correction first, which adds labor hours. The best way to get an accurate number is to request a quote based on your specific vehicle and its current paint depth. Expect the upfront investment to reflect the coating tier and prep work required.

Can I wax over ceramic coating?

You can, but you should not need to. A ceramic coating already provides hydrophobic properties and UV resistance that wax cannot match. Topping it with wax can actually mask the self-cleaning effect and water beading. If you want extra gloss enhancement, use a coating-specific maintenance spray instead. Stick to a pH-neutral maintenance wash to preserve the coating’s surface tension and avoid clogging the layer with wax residue.

Does ceramic coating prevent rock chips?

No. Ceramic coating adds chemical resistance and makes cleaning easier, but it does not absorb impact. Rock chips will still penetrate the clear coat and reach the paint. If chip protection is your priority, paint protection film (PPF) is the better choice because it is a thick, self-healing urethane layer. Many owners combine both: PPF on high-impact areas and ceramic coating on top for gloss and easy washing.

How long does professional ceramic coating actually last?

How long does ceramic coating last depends on the product tier, application quality, and how you maintain it. Entry-level coatings may last one to two years, while professional-grade multi-layer systems can last five years or more with proper care. Real-world durability drops if the car is parked outside, washed with harsh detergents, or exposed to road grime without regular decontamination. A yearly inspection helps you catch degradation early.


Ceramic coating rewards owners who plan to keep their vehicle and maintain it properly. Clean Image 101 brings professional-grade mobile detailing to your location, with expert bug removal, clay bar treatments, and paint restoration tailored to sports cars, SUVs, and minivans alike. Skip the drive and the guesswork. Book professional car care today with Clean Image 101 and protect your paint the right way.

How to Maintain Car Paint Finish: Ultimate 2026 Guide

Table of Contents

Last Updated: September 13, 2026

How Often to Wash Car to Protect the Finish

Washing your car every two weeks is the baseline for protecting modern paint, though the right interval depends on where you park and what you drive through. This guide from Clean Image 101 breaks down how to maintain car paint finish so it holds its gloss for years. A car paint finish is the factory multi-layer coating system: primer, base coat, and a clear coat that shields color from sun, rain, and road debris. When that clear coat degrades, nothing underneath can be saved.

Watch Out
Skipping washes for months lets contaminants bond to the clear coat. Once bonded, they require polishing or paint correction to remove, not soap and water.

Adjust frequency for conditions:

Southern California sun is unforgiving: UV rays break down clear coat polymers, and dirt left on the surface accelerates that breakdown by trapping heat (the EPA).

Choosing the Right Car Shampoo and Washing Technique

A pH-neutral shampoo paired with the two-bucket method is the safest combination for any automotive finish. Dish soaps strip wax and sealant, leaving paint exposed; a dedicated car shampoo cleans without removing protection.

A person wearing microfiber gloves using a two-bucket method to wash a dark luxury sedan in a driveway, with foam on the paint and a hose nearby, bright daylight

The two-bucket method works like this:

  1. Fill one bucket with clean shampoo solution and one with plain rinse water
  2. Load a microfiber mitt, wash one panel, then rinse the mitt in the clean water bucket
  3. Reload from the soap bucket and continue, panel by panel
  4. Rinse the whole car top-down before it dries
  5. Dry with a clean microfiber drying towel, not a chamois or bath towel

A common mistake is washing in direct sunlight. The soap dries mid-panel and leaves streaks that look like surface defects. Work in shade, and wash the roof and upper panels first so dirty water runs onto areas you haven’t cleaned yet.

The Benefits of Clay Bar Treatment for Paint Contaminants

Clay separates a clean car from a smooth one. Washing removes loose dirt but leaves bonded contaminants, industrial fallout, rail dust, brake dust, overspray, airborne metal particles, embedded in the clear coat. A clay bar shears those particles off rather than dissolving them.

The test is simple. After washing and drying, slide your fingertips across a panel, then across the inside of a clean plastic sandwich bag laid over the same panel. The bag amplifies friction, so grit you cannot feel with bare skin becomes obvious. If it drags, the paint needs claying.

Removing these embedded contaminants creates a pristine surface that reveals every minor imperfection, making it the ideal time to address any bodywork issues through paintless dent repair.

Mechanical vs. chemical decontamination

Most modern workflows split this into two stages, and order matters:

  1. Chemical decontamination first. An iron remover, a spray that turns purple as it dissolves ferrous particles, breaks down embedded brake dust and rail dust. It does the heavy lifting so the clay has less to shear off.
  2. Mechanical decontamination second. The clay bar (or a clay mitt, clay towel, or synthetic clay block) removes what the iron remover loosened and what it could not reach, including tree sap residue and overspray.

Skipping the iron remover means the clay bar is dragging sharp metal particles across the clear coat. That is how claying creates the swirl marks it is supposed to prevent.

Watch Out
Never clay a panel that has not been washed and chemically decontaminated. Clay picks up whatever is on the surface and holds it against the paint.

Clay grades and how to choose one

Clay is sold by aggressiveness, fine, medium, or heavy. Use the least aggressive grade that removes the contamination:

Synthetic alternatives, clay mitts, towels, and blocks, work faster and can be rinsed and reused, but tend to be more aggressive. On soft paint, a traditional fine-grade bar with plenty of lubricant is safer.

Lubrication and technique

Clay needs a dedicated clay lubricant or soapy water mix. Detailer spray alone is not enough on a dry panel; the bar will grab and mar.

Work in sections no larger than two feet by two feet:

  1. Mist the panel generously with lubricant.
  2. Glide the clay back and forth with light pressure, let the bar do the work, not your arm.
  3. Wipe the residue with a clean microfiber towel and check the surface with the bag test.
  4. Fold and knead the bar frequently so a clean face is always against the paint.
  5. Drop the bar on the ground? Throw it away. It will never be clean again.

Expect 45 to 90 minutes for a full-size vehicle. Clay also strips any wax or sealant, leaving the paint bare.

Pro Tip
After claying, apply a paint sealant or ceramic spray coating within the same session. Bare clear coat has no UV or contaminant defense.

What clay does not fix

Clay removes contamination, not defects. It will not remove swirl marks, scratches, oxidation, or water spot etching that has eaten into the clear coat, those require polishing or paint correction.

How to Remove Bird Droppings from Car Paint Safely

To remove bird droppings from car paint safely, soak the spot with a damp microfiber towel for several minutes, then lift it away without rubbing. Droppings are acidic and begin etching the clear coat within hours in warm weather; scraping them off dry grinds grit into the paint.

The process:

  1. Lay a soaked microfiber towel over the dropping and let it sit for five minutes
  2. Lift the towel straight up. Do not wipe
  3. Re-soak and repeat until the residue releases
  4. Follow with a quick-detail spray and a fresh towel
  5. Reapply wax or sealant to that panel

Tree sap responds to the same technique, though it often needs a dedicated sap remover. For baked-on bug splatter on a front bumper, a pre-soak product breaks down proteins before you touch the paint. Clean Image 101 brings professional mobile car wash and auto detailing to your location, with services including expert bug removal and clay bar treatments.

Wax, Sealant, or Ceramic Coating: Which Paint Protection Lasts

Ceramic coating outlasts both wax and paint sealant by a wide margin, but it costs more and requires more careful application. The right choice depends on how long you plan to keep the vehicle and how much upkeep you want.

Protection Type Typical Durability Best For Upkeep
Automotive wax Weeks Enthusiasts who enjoy monthly detailing Reapply often
Paint sealant Several months Daily drivers wanting low maintenance Reapply twice yearly
Ceramic coating Years Long-term owners, luxury vehicles Periodic inspection

Wax gives the warmest shine and is the most forgiving to apply. Sealant is a synthetic polymer that bonds to the clear coat and shrugs off UV and fallout longer. Ceramic coating forms a semi-permanent hydrophobic layer that makes washing easier, but it locks in existing surface defects, so paint correction should come first.

Book professional car care today →

For most drivers who want protection without a monthly ritual, sealant is the sensible middle ground. For a vehicle you intend to keep, ceramic coating pays off.

Seasonal Car Paint Maintenance and Water Quality Basics

Water quality is the most underrated variable in paint care. Tap water carries dissolved minerals, calcium and magnesium in hard water areas, plus chlorine and trace iron, and when a droplet evaporates on a hot panel, those minerals stay behind as a water spot. Given enough time and heat, the deposit etches into the clear coat, and etched spots must be polished out.

The fix is straightforward:

Watch Out
Hard water spots that have been on the paint for weeks or months are usually etched, not deposited. No wash or spray will remove them, only polishing will.

Seasonal maintenance schedule

Threats to your clear coat change with the calendar, and so should your routine. Adjust this baseline for your climate and storage.

Spring

Summer

Fall

Winter

Parking strategy compounds over years

A garage or covered space eliminates most UV, droppings, and sap at once. When you must park outside:

Key Takeaway
Water quality, drying technique, and parking choices compound over years. Filtered final rinses, immediate drying, and shade parking do more for long-term gloss than any single product.

Common Mistakes That Damage Car Paint Finish

The biggest mistake is treating paint like a hard surface. Clear coat is a thin polymer layer measured in microns, and every abrasive action removes some of it permanently.

Mistakes to stop making:

  • Using dish soap or household detergent, which strips protection
  • Washing with a sponge or an old rag that traps grit against the paint
  • Wiping bird droppings or bug splatter off dry
  • Skipping the rinse bucket and grinding dirt back into the surface
  • Letting hard water air-dry on the paint
  • Polishing aggressively instead of using the least abrasive method that works

Swirl marks are the visible result: fine circular scratches that dull the finish under direct light. Once clear coat is thinned enough, no wax or sealant restores the gloss. Paint correction can, but it removes more clear coat, and there is a limit to how often that can be done.

Prevention costs far less than correction. A pH-neutral shampoo, a microfiber mitt, the two-bucket method, and regular wax or sealant will keep a finish healthy for the life of the vehicle.


Maintaining a flawless finish takes consistent effort, and most busy owners simply do not have the hours for weekly two-bucket washes, clay bar sessions, and sealant reapplication. Clean Image 101 brings professional mobile car wash and auto detailing to your location, with skilled professionals experienced across sports cars, SUVs, trucks, and minivans. Services include expert bug removal, clay bar treatments, and paint restoration, all tailored to your vehicle’s specific needs. Book professional car care today with Clean Image 101 and keep your paint protected without leaving your driveway.

Frequently Asked Questions

What is the best way to keep my car paint shiny?

Wash your car every two weeks using a pH-neutral shampoo and the two-bucket method to avoid swirl marks. Apply a paint sealant or ceramic coating every three to six months for a protective layer that repels UV rays and contaminants. Park in shaded areas or use a car cover when possible. Drying with a clean microfiber drying towel prevents water spots that dull the finish over time.

How often should I wax my car to protect the paint?

Traditional automotive wax typically lasts four to eight weeks, so reapply every month to six weeks for consistent protection. Paint sealants last three to six months, and ceramic coatings can protect for a year or longer. If water stops beading on the surface, the protective layer has worn off and it is time to reapply. Southern California sun exposure can shorten these intervals.

Is a clay bar treatment necessary for paint maintenance?

A clay bar removes embedded contaminants like industrial fallout, tree sap, and overspray that washing alone cannot lift. Run your hand over the paint after washing; if it feels rough or gritty, a clay bar treatment is needed. Most cars benefit from claying once or twice a year. Always apply wax or sealant after claying because the process strips existing protection.

How do I prevent environmental damage like bird droppings and tree sap?

Remove bird droppings and tree sap as soon as you spot them, ideally within 24 hours. Bird droppings are acidic and can etch through clear coat quickly, especially in direct sun. Use a microfiber cloth and a dedicated bug and tar remover or pH-neutral shampoo to lift the residue gently. A ceramic coating or paint sealant adds a hydrophobic layer that makes removal easier and buys you time.

What is the difference between car wax, sealants, and ceramic coatings?

Car wax is a natural or synthetic paste that adds gloss and short-term protection, typically lasting four to eight weeks. Paint sealants are synthetic polymers that bond to the clear coat and last three to six months. Ceramic coatings use silicon dioxide to form a semi-permanent hydrophobic layer that can protect for a year or more and resist UV rays, chemicals, and minor scratches better than wax.

What common household items can damage car paint?

Dish soap strips wax and sealant and can dry out the clear coat over time. Paper towels and rough rags create swirl marks. Bug spray containing DEET damages paint on contact. Coffee, soda, and sunscreen can stain or etch the surface if left on. WD-40 can temporarily hide scratches but does not repair them and may leave an oily residue that attracts dust.

Best Mobile Detailing Alternatives in California: 2026 Guide

Table of Contents

Last Updated: September 12, 2026

Why Mobile Detailing Beats Traditional Shops

Mobile detailing is a professional auto detailing service performed at your home or office rather than at a fixed shop. In Southern California, where a single freeway backup can eat an hour of your day, that difference matters. This guide from Clean Image 101 breaks down your real alternatives, what professional auto detailing cost covers, and how to vet a provider before handing over your keys.

The core advantage: you stop trading time for convenience. A traditional shop requires drop-off, a waiting period or second trip, and a schedule built around their bay availability. A mobile service builds the schedule around yours.

Time and Convenience in Southern California Traffic

The average commute already consumes a substantial share of the workday, and a Saturday round trip to a detailing shop can wipe out half a weekend. Mobile detailing removes that trip entirely: the detailer arrives with water, power, and equipment while you keep working, parenting, or relaxing.

Quality and Service Scope: What to Expect

A common misconception is that mobile means a basic wash. In practice, a well-equipped mobile unit handles interior detailing, exterior detailing, clay bar treatment, swirl mark removal, and hydrophobic protection. What changes is the setting, not the standard. The limitation is infrastructure: jobs requiring a fixed paint booth or multi-day paint correction may still need a shop.

What Professional Auto Detailing Cost Actually Covers

Professional auto detailing cost reflects labor hours, product quality, and equipment, not just soap and water. An express detail covers a wash, wheel cleaning, and interior wipe-down. A full-service package adds surface decontamination, clay bar treatment, upholstery cleaning, leather conditioning, and sometimes engine bay cleaning or headlight restoration. Paint correction and ceramic coating sit at the top, consuming the most labor hours and expensive consumables. Consistent car interior maintenance preserves the vehicle’s condition and prevents unexpected financial penalties when returning a leased vehicle.

Pricing depends on vehicle size, condition, and services selected, so any provider quoting a flat number before seeing your car is guessing. Ask for a breakdown by service and confirm what each tier includes.

The Four Cost Drivers That Move the Quote

Most quotes are built from the same four inputs. Understanding them lets you compare apples to apples instead of chasing the lowest number.

Typical Service Tiers and What They Include

Tier What It Covers Typical Scope
Express Wash, wheels, windows, interior wipe-down, vacuum 1-2 hours
Full-service Express plus clay bar, wax or sealant, upholstery and leather care, door jambs 3-5 hours
Paint correction Full-service plus machine polishing to remove swirls and light scratches 6-12 hours
Correction + coating Paint correction plus a ceramic coating with prep and cure time 1-3 days

Treat these as scope descriptions, not price tags. Two detailers quoting the same tier can still be quoting different amounts of work.

DIY vs. Professional: A Cost-Benefit Breakdown

The DIY case looks strong until you itemize it. A ceramic coating or paint protection film applied incorrectly can leave high spots, streaks, or uneven coverage that costs more to remove than the original job (PubMed). Waterless wash products work for light dust but will mar a gritty finish if used carelessly.

Factor DIY Approach Professional Mobile Detailing
Upfront cost Low per wash, high for tools and products Quoted per service
Time investment Several hours per session None beyond handover
Paint correction High risk of swirl marks Trained technique, controlled process
Ceramic coating Difficult to apply evenly Applied with proper prep and cure
Result consistency Varies by effort and weather Repeatable, documented process
Resale impact Inconsistent results can hurt value Documented service history supports value
Watch Out
The most expensive detailing mistake is a cheap ceramic coating job. Improper prep traps contamination under the coating, and removing it later requires polishing that strips the layer entirely.

How to Read a Quote Without Getting Upsold

Ask for the quote in writing with the tier name, specific steps, and estimated time on site. If a provider cannot name the steps, they are pricing by feel. If the quote is far below the others, ask what is being skipped, usually decontamination, paint prep, or cure time. If it is far above, ask which condition factors drive the number. A detailer who can explain the inputs can defend the output.

Pro Tip
A fair quote names the vehicle, the condition, the tier, and the time. A weak quote names only a dollar figure. Ask for the four inputs before you compare anything.

How to Choose a Car Detailer: A Vetting Checklist

Knowing how to choose a car detailer comes down to verification, not marketing. Ask for proof of insurance, recent local references, and photos of completed work on similar vehicles.

Insurance and Liability: Questions to Ask

Ask directly: “If your equipment damages my paint, what is your claims process?” A professional operation answers without hesitation. Get it in writing, with the policy holder’s name and coverage limits.

Pro Tip
Ask for the certificate of insurance before the appointment, not after. Legitimate operators send it the same day. If a provider deflects or says they will “bring it,” treat that as a signal.

Mobile Car Wash Regulations in California You Should Know

Mobile car wash regulations in California center on water discharge and runoff, not the act of washing itself. Wastewater containing soap, oil, and road grime is classified as a pollutant, and letting it flow into a storm drain violates state and federal clean water rules. A compliant mobile operator captures runoff with a reclamation mat or containment system and disposes of the water properly.

This is the section most mobile detailing guides skip, and it separates a legitimate operator from a driveway wash with a business card. If you own a luxury, leased, or shared-lot vehicle, compliance determines who is liable if runoff reaches a storm drain or a neighbor’s property.

The Two Layers of Rules That Apply

Mobile detailing is regulated at two levels, and both matter.

Because the local layer varies by municipality and water district, the same service can be compliant in one city and non-compliant a few miles away. A serious operator knows the rules for the areas they serve, not just the rules in general.

What Compliance Actually Looks Like On Site

You do not need to read the regulations to verify compliance, just know what to look for when the van arrives.

Questions to Ask Before You Book

Use these to vet any mobile operator.

An operator who answers without hesitation has solved the problem; one who deflects has not.

Key Takeaway
Regulatory compliance is a buyer-protection issue, not just an environmental one. If runoff from your driveway reaches a storm drain, the liability can follow the property owner as well as the operator. Choosing a compliant detailer is choosing to keep that risk off your address.

For current requirements in your location, check with your local water authority and the state environmental agency, since rules vary by municipality and water district. The questions above are the practical filter, the agencies are the final word.

State environmental agency water quality resources

Comparing the Top Mobile Detailing Alternatives

The alternatives fall into two groups: services that clean your car and software that runs a detailing business. If you are a vehicle owner, only the first group matters.

A professional mobile detailer in a branded van working on a luxury car in a driveway, with detailing tools and a spray bottle visible in the foreground

Clean Image 101: Best for Southern California Convenience

Clean Image 101 brings professional, passionate mobile car wash and auto detailing services directly to your location, transforming vehicles of all types, from sports cars to minivans, into masterpieces. Our skilled professionals, with years of industry experience, deliver expert bug removal, clay bar treatments, and paint restoration. The result is professional care tailored to your vehicle’s needs, with no trip to a shop and no disruption to your day.

QuoteIQ and Mobile Tech RX: Best for Business Operations

These platforms serve detailers, not car owners. QuoteIQ is a business management and CRM tool for mobile detailing professionals, covering automated estimates, customer history, route optimization, and invoicing. It starts at $29.99/month and scales to $699/month for advanced features. Mobile Tech RX focuses on accurate service estimation and vehicle documentation, starting at $30/month, and suits solo operators needing standardized pricing, though its interface has a steeper learning curve for non-technical users.

Screenshot of myquoteiq.com interface
QuoteIQ | All-In-One Home Service Management Tool

Jobber and Urable: Best for Scaling Detailing Businesses

Jobber is a general field service platform with drag-and-drop scheduling, automated appointment reminders, a client portal, and QuickBooks integration. Pricing requires contacting the company, and its broad design lacks some detailing-specific features. Urable is built specifically for auto detailing and ceramic coating businesses, with digital vehicle inspection forms, automated follow-up marketing, and inventory management. It starts at $45/month and can reach $166/month depending on business size.

Option Best For Starting Price Key Strength
Clean Image 101 Vehicle owners wanting on-site service Quote on request Full-service mobile detailing
QuoteIQ Independent detailers $29.99/month Estimates and CRM
Mobile Tech RX Solo operators $30/month Accurate estimating
Jobber Multi-service field teams Contact for pricing Scheduling and integrations
Urable Coating-focused shops $45/month Inspection and retention tools

Frequently Asked Questions

Is it still illegal to wash your car in the driveway in California?

It depends on your local jurisdiction. Many California cities and water districts restrict driveway washing because runoff carries soap, oil, and heavy metals into storm drains, which flow untreated to waterways. Some areas allow it if you use a shut-off nozzle and biodegradable soap, while others require washing at a commercial facility that captures or treats runoff. Check your city’s municipal code or water district rules before washing at home. Mobile detailers typically use waterless or low-water methods and reclaim systems to comply with these local rules.

How much should I tip for a car detail?

Tipping is not mandatory, but 10% to 20% is customary for good service, especially if the detailer spent extra time on stubborn stains or pet hair. For a full detail with paint correction or ceramic coating, a flat $20 to $50 tip is common. If you are unsure, ask the detailer directly whether gratuity is included in the quoted price. Cash tips are always appreciated, but most mobile services also accept digital tips through their payment app.

What mobile car wash regulations apply to operators in California?

Mobile detailers in California must comply with Clean Water Act requirements, which prohibit untreated wash water from entering storm drains. Many operators use waterless products, reclaim mats, or discharge to sanitary sewers with permission. They also need a business license, may need a California EPA identification number for hazardous waste, and must follow local water district rules. Ask any mobile detailer how they handle runoff and whether they carry liability insurance before booking.

How do I choose between mobile detailing and a professional car wash chain?

Mobile detailing brings the service to your home or office, which saves time and reduces the risk of swirl marks from automated brushes. Car wash chains are faster and often cheaper for a basic exterior wash, but they rarely offer paint correction, clay bar treatment, or interior deep cleaning. If your vehicle needs swirl mark removal, ceramic coating, or upholstery cleaning, a mobile detailer with proper equipment is the better choice. For a quick rinse between full details, a chain wash works fine.

What should I look for when vetting a mobile detailer?

Ask for proof of liability insurance and a business license, then request references from customers with similar vehicles. Check reviews on Google and Yelp for mentions of paint damage, punctuality, and water spot issues. A reputable detailer will offer a pre-service inspection, use proper lighting to check for swirl marks, and provide a written estimate before starting. Avoid anyone who quotes a price without seeing your vehicle or who cannot explain their water containment method.


Deciding between a DIY Saturday and a professional service comes down to what your time and your paint are worth. Clean Image 101 delivers mobile service that comes to your location, handles diverse vehicle types from sports cars to minivans, and covers everything from bug removal to paint restoration. Get started with Clean Image 101 and keep your vehicle looking its best without leaving your driveway.

Best Car Detailing for Luxury Vehicles: 2026 Guide

Table of Contents

Last Updated: September 11, 2026

What Separates Luxury Car Detailing From a Standard Wash

A standard wash removes surface dirt; luxury car detailing protects an asset. That’s why the best car detailing for luxury vehicles looks nothing like a $20 tunnel wash.

The difference comes down to three things: surface preparation, chemical safety, and clear coat condition before anything touches it.

Paint Correction, Clay Bar Treatment, and Surface Preparation

Paint correction is machine polishing that removes swirl marks, oxidation, and fine scratches from the clear coat. Before polishing, a proper detailer runs a clay bar treatment to pull out embedded contaminants washing alone can’t lift.

Surface preparation follows a logical sequence:

Skipping the depth gauge is the most common mistake. On a luxury vehicle, clear coat is thin and expensive to replace. Polishing through it means a repaint.

pH-Neutral Products and Microfiber Technology

pH-neutral products clean without stripping wax, sealant, or ceramic coating. Acidic wheel cleaners and harsh degreasers eat through protection and dull trim.

Microfiber does the rest. A quality towel traps particles instead of dragging them, which is why a detailer might use six or seven towels on a single panel. Cheap towels and dirty wash mitts cause swirl marks.

If you want to see how this plays out in practice, the chemistry of automotive cleaning products explains why pH balance matters more than foam volume.

Quick Comparison: Top Detailing Services for Luxury Vehicles

The right service depends on what your paint and interior actually need. Here’s how the main categories of luxury detailing stack up.

Service Category What It Actually Does Best For Typical Time Typical Price Range
Express maintenance wash pH-neutral hand wash, wheels, glass, quick interior wipe Garaged cars between full details 1-2 hours $75 – $150
Interior deep clean and conditioning Steam extraction, leather cleaning, conditioner, UV protectant on trim Daily drivers, family haulers, pre-sale prep 2-4 hours $150 – $350
Single-stage paint correction One machine polish pass to remove light swirls and boost gloss Newer paint with minor marring 4-6 hours $300 – $600
Multi-stage paint correction Two or three compounding and polishing steps to remove deeper defects Older paint, neglected finishes, pre-coating prep 1-2 days $600 – $1,500+
Ceramic coating Liquid polymer bonded to clear coat for hydrophobic, UV-resistant protection Owners keeping the car 3+ years 1-2 days including cure $800 – $2,500+
Paint protection film (PPF) Urethane film applied to high-impact panels to absorb rock chips and scratches New cars, track cars, highway commuters 1-3 days $1,500 – $6,000+ depending on coverage
Window tint and ceramic film Dyed or ceramic film applied to glass to cut heat and UV Any vehicle with factory-clear glass 2-4 hours $200 – $800

A few things that table doesn’t capture:

For a deeper look at what professional detailing should include, JD Power’s detailing cost guide breaks down the components of a full-service job.

Key Takeaway
Match the service to the problem. If your paint is already in good shape, a maintenance wash plus a sealant or coating is enough. If you can see swirl marks in direct sun, you need correction before any protection goes on top.

Ceramic Coating for Luxury Cars: Protection That Lasts

Ceramic coating for luxury cars is a liquid polymer that bonds to the clear coat, creating a semi-permanent hydrophobic layer. Water beads off, UV protection slows oxidation, and the surface resists chemical staining.

The coating is only as good as the preparation beneath it. Applying ceramic over swirl marks locks those defects in permanently, so a reputable shop insists on paint correction first, even when the customer only asked for coating.

Coating doesn’t make your car scratch-proof. It makes it easier to clean and harder to contaminate, but you still need proper hand wash technique.

A paint sealant sits at the other end of the spectrum: less durable, far cheaper, and a reasonable choice if you’re leasing or planning to sell within a year.

How Long Does Luxury Car Detailing Take?

A full luxury car detailing appointment typically runs four to eight hours, depending on paint condition and service level. A maintenance wash takes one to two hours, while multi-stage correction plus ceramic coating can stretch across two days for cure time.

Here’s how the time breaks down:

Service Level Time Required Frequency
Maintenance hand wash 1-2 hours Every 2 weeks
Interior deep clean 2-3 hours Every 3-4 months
Full detail with correction 4-8 hours Every 6-12 months
Correction plus ceramic coating 1-2 days Every 2-5 years

The variable that catches people off guard is paint condition. A garaged weekend car needs far less correction than a daily commuter that parks outside.

Mobile Luxury Car Detailing Cost: What Affects Your Quote

Mobile luxury car detailing cost depends on vehicle size, paint condition, and services selected. There’s no flat rate, and any provider quoting one without seeing the car is guessing.

Factors that move your quote:

Because pricing varies this much, Clean Image 101 quotes each vehicle individually. Request a quote with your vehicle details and paint condition for an accurate number.

Detailer in nitrile gloves holding a digital paint depth gauge against the hood of a dark luxury sports car inside a brightly lit detailing studio, microfiber towels and clay bar tools on a rolling cart nearby

DIY vs. Professional Detailing: Where the Trade-Offs Land

DIY detailing makes sense for maintenance, rarely for correction.

If you’re doing a weekly hand wash with pH-neutral shampoo, quality microfiber towels, and a two-bucket setup, you’re protecting your investment. Keep doing that.

Where DIY breaks down:

Watch Out
The most expensive DIY mistake is polishing through clear coat on a luxury panel. Repairing it means a professional repaint, which costs far more than the detailing you were trying to avoid paying for.

A reasonable split: handle maintenance washes yourself, and bring in a professional for correction, coating, and interior restoration.

Maintenance Schedules for Leather, Paint, and Trim

Most detailing guides give one schedule for the whole car. That doesn’t work on a luxury vehicle, because an Alcantara headliner, a Nappa leather seat, a carbon fiber roof, and a clear-coated fender all age on different clocks. Here’s a material-by-material calendar.

Leather: Nappa, Semi-Aniline, and Standard Finished Leather

Not all leather is the same. Nappa and semi-aniline hides are softer and more porous, making them more vulnerable to dye transfer from dark denim and UV drying. Standard finished leather has a protective topcoat that resists staining better but still cracks if it dries out.

Alcantara and Suede

Alcantara is a synthetic microfiber, not leather, and needs a different approach. Water alone can leave rings, and brushing the nap the wrong way creates permanent shine.

Paint and Clear Coat

Carbon Fiber and Gloss Trim

Carbon fiber on a roof, hood, or interior trim is usually clear-coated, so it behaves like paint but shows every swirl mark in the weave. Treat it like soft paint.

Wheels, Calipers, and Brake Dust

Engine Bay and Undercarriage

Glass, Trim, and Rubber Seals

Pro Tip
Keep a written log of every wash, coating, and conditioning date, plus products used. When you sell a luxury vehicle, documented care history is a genuine negotiating asset. A simple spreadsheet with date, mileage, service, and product is enough.

If you’re considering protection film, the difference between paint protection film and ceramic coating explains how PPF absorbs impact while coating handles chemical resistance. Many owners use both.

Frequently Asked Questions

How much does it cost to detail a luxury car?

Pricing depends on vehicle size, condition, and the services you choose. Paint correction and ceramic coating packages sit at the higher end, while maintenance washes cost less. Mobile luxury car detailing cost also reflects travel and setup at your location. Clean Image 101 does not publish flat rates because every luxury vehicle needs a different level of surface preparation. Request a quote based on your car’s paint condition and interior materials for an accurate number.

Is mobile detailing safe for luxury vehicles?

Yes, when the detailer uses proper methods. Safe mobile luxury car detailing relies on a two-bucket wash, pH-neutral shampoo, clean microfiber technology, and a water source that prevents spotting. The risk comes from rushed work: dirty mitts, harsh chemicals, and direct sun that bakes residue onto the clear coat. Ask any mobile provider how they handle water spots, bug splatter, and red clay buildup before you book.

How long does luxury car detailing take?

A maintenance wash and interior wipe-down runs 1 to 2 hours. A full interior and exterior detail takes 3 to 5 hours. Paint correction with ceramic coating for luxury cars can take 1 to 3 days because the vehicle needs decontamination, machine polishing, and coating cure time between stages. How long does luxury car detailing take at your home depends on whether the detailer can work under shade with a stable power and water supply.

How often should a luxury vehicle be professionally detailed?

Most luxury vehicles benefit from a professional detail every 3 to 4 months, with a maintenance wash every 2 to 4 weeks in between. Leather conditioning every 3 to 6 months keeps hides supple and prevents cracking. Ceramic-coated cars need less frequent waxing but still require periodic decontamination. Vehicles driven daily in coastal or dusty conditions need shorter intervals than garage-kept weekend cars.

What is the difference between standard and luxury car detailing?

Standard detailing focuses on making a car look clean: wash, vacuum, wipe-down, and tire dressing. Luxury car detailing adds paint decontamination, clay bar treatment, machine buffing and polishing, paint depth gauge readings, and leather treatment that preserves the original finish. The goal shifts from appearance to long-term value protection, including clear coat integrity, oxidation removal, and trim restoration.


Luxury vehicles lose value fastest when their surfaces are neglected, and catching up costs far more than keeping up. Clean Image 101 brings mobile detailing to your home or office, with skilled professionals who handle everything from expert bug removal and clay bar treatments to paint restoration on sports cars, SUVs, and minivans. You get tailored care without the drive to a shop. Book professional car care today and keep your vehicle looking the way it did the day you bought it.

Expert Car Detailing Tips for Commuters

Table of Contents

Last Updated: September 7, 2026

Your daily commute is one of the harshest environments your car’s finish and interior will ever face. Between highway grime, baked-on bug splatter, UV rays, and the constant wear of getting in and out, a daily driver accumulates damage that weekend-only cars never see. That’s why expert car detailing tips for commuters focus less on occasional deep cleans and more on consistent, smart maintenance, and these car detailing tips are essential for preserving your daily driver. The biggest difference between a well-kept commuter car and a neglected one isn’t money, it’s routine.

Most guides treat car care as an all-day weekend project, which fails for anyone who drives to work daily. A few targeted, 10-minute habits will protect your paint and interior far better than a monthly marathon. Below, we’ll show you how to build a routine that fits between meetings and protects your resale value.

Why Your Commute is Harder on Your Car Than You Think

Commuter vehicles face a unique combination of stressors that garage-kept cars simply don’t encounter. Highway driving bombards your front bumper and hood with abrasive debris, while stop-and-go traffic generates brake dust that embeds itself in your wheels. The sun beating through your windshield during a parked workday degrades dashboard plastics and leather, causing fading and cracking over time.

The most overlooked culprit is the simple act of entering and exiting your vehicle. Each time you slide across the seat, you transfer oils and friction to your upholstery. Coffee spills, fast-food crumbs, and dust from your shoes accumulate in carpet fibers, creating an environment where odors and bacteria thrive. Interior air quality suffers too, which matters when you spend an hour or more breathing that air twice daily.

The 5-Step Weekly Maintenance Routine for Daily Drivers

Generic detailing advice assumes you have a free Saturday and a driveway. Commuters don’t. The winning strategy is a structured, time-boxed routine that fits into a busy workweek. This system is designed for a 30-minute block, split into two 15-minute sessions, and requires no hose or dedicated garage space.

A busy professional in a parking garage using a microfiber towel to wipe down a car dashboard, with a detailing spray bottle nearby

Session 1: The 15-Minute Interior Reset (Tuesday or Wednesday)

This session targets the high-traffic zones that accumulate the most visible grime mid-week. It’s a strategic reset to keep your cabin presentable for clients or passengers.

  1. The 2-Minute Trash and Debris Sweep: Before you touch a towel, remove all visible trash, loose change, and debris from the door pockets, cup holders, and under the seats. This prevents dirt from being ground into the carpet later.
  2. The 5-Minute Targeted Vacuum: Skip the whole floor. Focus exclusively on the driver’s footwell, the seat tracks, and the gap between the seat and the center console. These are the areas where dirt and crumbs accumulate fastest and are the first places a passenger notices. A cordless handheld vacuum with a crevice tool is ideal for this task.
  3. The 8-Minute Surface Wipe-Down: Use a damp (not dripping) microfiber towel with a quick detailer spray to wipe down the dashboard, steering wheel, door panels, and center console. The key is to use a product with UV inhibitors to protect against sun damage from your daily windshield exposure. A rapid-application spray like the Auto Finesse Spritz Interior Quick Detailer removes light dust while leaving a non-greasy, matte finish that doesn’t create glare on your windshield.

Session 2: The 15-Minute Exterior Spot Clean (Friday or Saturday)

This session is about preventing paint damage, not achieving a show-car shine. It addresses the contaminants your car picked up during the week’s commutes.

  1. The 3-Minute Wheel and Tire Check: Spray your wheels with a dedicated wheel cleaner and let it dwell for 2-3 minutes. This loosens brake dust before you even touch them. A quick rinse with a spray bottle or a damp towel will remove the bulk of the dust, preventing it from baking onto the wheel surface over the weekend.
  2. The 10-Minute Waterless Wash: This is the core of the commuter routine. The Garry Dean Method, popular among detailing enthusiasts, is the most effective technique for this. It uses multiple microfiber towels soaked in a rinseless solution, allowing you to safely wash your car in a parking lot or garage with minimal water. The process is simple: fold a soaked towel into quarters, wipe a single panel with light pressure, then flip to a clean side for the next panel. This prevents paint swirls because each panel gets a fresh, clean towel section, never redistributing dirt across your clear coat.
  3. The 2-Minute Glass and Mirror Wipe: Use a dedicated glass cleaner and a separate, dry microfiber towel to clean the inside and outside of your side mirrors and the rear windshield. This is a safety-critical step that takes seconds but dramatically improves visibility.
Pro Tip
The Garry Dean Method has a learning curve. Practice on your lower panels first. If you press too hard or use a dirty towel, you’ll drag grit across your automotive paint. The technique rewards patience and light pressure.

This two-session structure breaks the task into manageable chunks that don’t interfere with your workweek. It’s about consistency, not perfection, and it will keep your car presentable and protected without sacrificing your weekend.

How Often to Detail a Car That’s Driven Daily

The ideal detailing frequency for a daily driver balances protection with your available time. For interior detailing, a light weekly wipe-down keeps dust and grime from building up. A deeper interior vacuuming and surface cleaning should happen every two to three weeks to address accumulated debris in carpets and upholstery.

Exterior washing depends on your environment. If you park under trees or near construction, wash weekly. If you drive mostly on clean highways, a bi-weekly exterior wash with a pH-neutral car shampoo using the two-bucket method prevents contaminant buildup without stripping your wax or sealant. A full professional detailing service, including paint decontamination with a clay bar, should occur every three to four months to remove embedded contaminants that regular washing misses.

Watch Out
Skipping regular washes to save time actually costs you more later. Bird droppings, tree sap, and bug splatter etch into clear coat permanently if left for weeks. What starts as a free wash turns into a paint correction bill.

Best Interior Car Cleaning Products for Commuters

Choosing the right products matters more than the time you spend cleaning. For commuters, the best interior car cleaning products prioritize speed, UV protection, and safe application across multiple surfaces. Your dashboard, door panels, and center console are typically made of different materials, so a versatile product saves you from juggling multiple bottles.

The Core Product Trio

  1. A Versatile Quick Detailer Spray: Look for a spray that works on plastics, vinyl, and rubber. The Auto Finesse Spritz mentioned earlier fits this role well, offering UV inhibitors and a matte finish at a reasonable price point. This is your primary tool for the weekly wipe-down.
  2. A Dedicated Fabric Spot Treatment: For upholstery, keep a dedicated spot treatment spray on hand for coffee spills and stains. Address spills immediately by blotting, never rubbing, which pushes the liquid deeper into the fibers. A product with an enzyme-based formula is effective for breaking down organic stains like coffee or food.
  3. A pH-Neutral All-Purpose Cleaner (APC): A diluted APC is a versatile workhorse for tackling tougher grime on door jambs, floor mats, and plastic trim. It’s more aggressive than a quick detailer but safe for most interior surfaces when diluted correctly. Always test in an inconspicuous area first.

The Overlooked Commuter Priority: Cabin Air Quality

While product selection is important, the most significant interior health factor for commuters is the air you breathe. You spend 1-2 hours daily in a sealed environment, and the cabin air filter is your first line of defense against pollen, dust, and exhaust fumes. cleaning tips for professionals.

Most manufacturers recommend replacing the cabin air filter every 12,000 to 15,000 miles or at least once a year (fleetowner.com). For commuters who sit in traffic, this interval should be shortened to every 6-12 months. A clogged filter reduces airflow, strains your HVAC system, and can circulate stale, musty air. Replacing it is a simple DIY task that takes about 10 minutes and requires no tools on most vehicles. You can find the filter location in your owner’s manual or via a quick online search. A clean filter is a more impactful upgrade to your daily driving experience than any interior spray.

Watch Out
A neglected cabin air filter is a silent health hazard. It can harbor mold, bacteria, and allergens that are blown directly into your face every time you turn on the fan. If you notice a musty smell when you first turn on your AC, your filter is likely overdue for a replacement.

A Note on Microfiber Maintenance

The best product in the world is useless if your application tool is dirty. Microfiber towels are the workhorse of detailing, but they require specific care. Wash them separately from cotton towels and other laundry to prevent lint transfer. Use a liquid detergent that is free of dyes and fragrances, and never use fabric softener, which coats the fibers and destroys their absorbency. Air-dry them or use a low-heat setting in the dryer. A clean, plush microfiber towel is the single most important tool in your detailing arsenal.

Protecting Your Paint from Highway Grime and Sun

Your car’s front end takes the brunt of highway driving. Bug splatter, small stones, and road salt all impact your bumper, hood, and mirrors. Without protection, these contaminants etch into your clear coat, leaving permanent marks that dull your finish.

Book professional car care today →

Paint Decontamination and Protection Options

Paint protection falls into two categories: temporary and long-term. Traditional waxes and sealants provide a few months of protection and require reapplication. Ceramic coatings like the CarPro CQuartz system offer a more durable solution, creating a hydrophobic barrier that makes washing dramatically easier and protects against environmental contaminants for years.

For commuters, the appeal of a ceramic coating is time savings. Water beads off, dirt doesn’t stick as aggressively, and your weekly waterless wash takes half the time. The trade-off is the initial cost and the careful surface preparation required before application. A professional detailer handles the decontamination and application correctly, ensuring the coating bonds properly to your automotive paint.

Mobile Car Detailing Benefits for Time-Strapped Professionals

Mobile car detailing benefits extend beyond convenience for busy commuters. When a professional team comes to your office or home, you eliminate the downtime of driving to a shop and waiting. The service happens while you work, attend meetings, or spend time with family, making it the most efficient way to maintain a high-standard vehicle.

Consumer Reports’ guide on car care frequency notes that regular maintenance prevents costly repairs, and the same logic applies to your car’s appearance. Professional mobile detailers bring expertise and equipment that outperform DIY efforts, particularly for tasks like bug removal and paint restoration. A service that includes exterior wash, interior vacuuming, and surface cleaning can typically be completed in under an hour, fitting neatly into a lunch break.

Common Mistakes Commuters Make with Their Car’s Finish

The most damaging habits aren’t neglect, they’re well-intentioned but incorrect care methods. Dish soap strips protective wax, and automatic car washes with spinning brushes introduce fine scratches and swirls. Both seem convenient but create long-term problems.

Another frequent error is using the same microfiber cloth for wheels and paint, as wheel towels pick up abrasive particles that scratch your clear coat. Wiping dust off a dry car with a dry towel also acts like sandpaper. Always use a lubricated wash method or a quick detailer spray.

Your Commuter Car Care Schedule: A Simple Plan

Task Frequency Time Required Best Method
Interior wipe-down Weekly 10 minutes Microfiber + quick detailer spray
Interior vacuum Every 2-3 weeks 15 minutes Handheld vacuum, focus on footwells
Exterior spot clean Weekly 15 minutes Waterless wash method
Full exterior wash Bi-weekly 30-45 minutes Two-bucket method, pH-neutral shampoo
Paint protection check Monthly 5 minutes Test water beading on hood
Professional detail Every 3-4 months 1-3 hours Mobile detailing service

This schedule protects your vehicle without demanding your entire weekend. The weekly tasks take about 30 minutes total. For weeks when even that feels impossible, a professional detailing service bridges the gap.

The American Automobile Association’s vehicle maintenance tips emphasizes that consistent care extends vehicle life and preserves value. That principle applies to aesthetics as much as mechanics. A car that looks well-maintained also tends to be better maintained mechanically, because you notice issues sooner when you’re regularly inspecting and cleaning your vehicle.

The difference between a commuter car that looks old and one that looks new comes down to consistency, not expensive products. A few minutes each week, the right supplies, and the occasional professional deep clean will keep your daily driver looking sharp. When your schedule won’t allow a thorough DIY session, professional mobile detailing from Clean Image 101 brings the expertise to your driveway or office parking lot. Book professional car care today and give your commuter vehicle the protection it deserves.

Frequently Asked Questions

How often should commuters get their car professionally detailed?

For a daily driver, a professional detail every 3 to 4 months is a solid baseline. This frequency handles the build-up of road grime, interior dust, and UV damage that accumulates during a commute. Between those visits, a quick monthly interior wipe-down and exterior waterless wash keeps things presentable. If you park outside or have a long highway commute, you might move to every 2 to 3 months to stay ahead of environmental contaminants.

What are the best interior car cleaning products for commuters?

Look for a few versatile essentials. A quick interior detailer spray, like Auto Finesse Spritz, is perfect for a fast weekly wipe-down of dashboards and consoles, offering UV protection to prevent cracking. Keep a pack of high-quality microfiber towels dedicated to interior surfaces. For spills or high-traffic stains on fabric upholstery, a dedicated spot cleaner and a small upholstery brush will handle most issues before they set.

What is the most effective way to remove road grime from a daily driver?

The safest method for a daily driver is a rinseless or waterless wash technique, such as the Garry Dean Method. This approach uses a high volume of microfiber towels and a lubricating solution to lift grime away from the paint without scratching. It is ideal for commuters without access to a hose and is gentle enough to use weekly. For heavier build-up, a traditional two-bucket wash with a pH-neutral car shampoo and a microfiber wash mitt is more thorough.

How can I protect my car’s paint during a long daily commute?

A ceramic coating, such as CarPro CQuartz, is one of the best defenses for a commuter vehicle. It creates a durable, hydrophobic layer that makes it harder for road grime and bug splatter to bond to your automotive paint. This means your weekly wash is faster and safer. If a full ceramic coating isn’t in the budget, a quality spray sealant applied every few months offers a good balance of protection and ease of use.

What essential detailing tools should every commuter keep in their trunk?

Keep a small kit for quick touch-ups. Include a few plush microfiber towels for dusting and spot cleaning, a bottle of quick detailer spray for light grime, and a separate glass cleaner with its own towel to avoid streaks. A small interior brush is useful for dislodging dust from air vents. This setup lets you handle a coffee spill or a dusty dash in minutes, keeping your car professional between full details.

How to Remove Baked On Bug Splatter (2026 Guide)

Table of Contents

Last Updated: September 6, 2026

Baked on bug splatter is more than an eyesore; it is an acidic organic residue that can permanently etch your vehicle’s clear coat if left untreated. The heat from your engine hood and direct sunlight essentially bakes these insect remains onto the paint, making them harder to remove the longer they sit. This guide from Clean Image 101 walks you through the safest, most effective methods for removing baked on bug splatter without scratching your finish, covering everything from pre-soaking techniques to clay bar treatments.

Why Baked On Bug Splatter Damages Your Car Paint

The primary danger of bug splatter comes down to chemistry and time. Insects contain organic acids and enzymes designed to break down organic matter, and unfortunately, your car’s clear coat is vulnerable to these compounds. When the sun bakes the splatter onto the surface, it creates a concentrated, acidic residue that begins eating into the clear coat, leaving behind a permanent “ghost” outline or paint etching.

Many drivers assume a simple car wash will solve the problem. In practice, standard soap and water are rarely strong enough to dissolve the caked-on proteins and chitin that make up dried bug residue. The longer the splatter remains, the deeper the contamination can set, which is why acting quickly and using the right technique matters more than elbow grease. Automotive paint is a multi-layer system, and once etching penetrates the clear coat, the only true fix is professional paint correction to level the surface again.

What You’ll Need: Best Bug and Tar Remover for Cars

When you are searching for the best bug and tar remover for cars, you want a product specifically formulated to break down organic matter rather than a general all-purpose cleaner. A dedicated bug remover typically uses solvents or enzymes that target the proteins and fats in insect residue, allowing you to wipe the splatter away without aggressive scrubbing (peer-reviewed research). Products labeled as pH-balanced are safer for your wax layer and clear coat, while generic degreasers can strip your protection and dry out rubber trim.

Chemical Removers vs. Natural Solutions

Chemical bug removers are the most effective option for baked on splatter because they are engineered to dissolve the specific biological compounds in insect residue. They come in spray bottles for easy application and are designed to be safe on automotive paint when used as directed. Natural solutions, such as a vinegar and water mixture or a baking soda paste, can work on fresh splatter but often struggle with residue that has been baked on for days. A common mistake is reaching for a citrus-based household cleaner, which can be too harsh for your clear coat and may leave behind an oily film.

How to Remove Baked On Bug Splatter: Step-by-Step

Removing baked on bug splatter requires patience and the right sequence of steps to avoid inflicting more damage than the bugs did. The core principle is to use lubrication and chemical action to dissolve the residue before you ever introduce physical agitation. Rushing the process with dry cloths or hard scrapers is the fastest way to add swirl marks and scratches to your paint.

A gloved hand spraying a dedicated bug remover onto the front bumper of a dark blue car, where dried white and yellow bug splatter is clearly visible on the glossy paint surface

Step 1: Pre-Soak and Lubricate the Surface

Park your car in the shade and let the paint cool down completely; applying chemicals to a hot surface can cause them to evaporate too quickly or leave residue. Spray your chosen bug and tar remover generously over the affected areas, focusing on the front bumper, grille, and side mirrors. The goal of the pre-soak is to saturate the splatter and begin dissolving it from the outside in, so let the product dwell for the time specified on the label, usually three to five minutes. This dwell time is critical because it reduces the amount of physical effort needed and protects your clear coat from unnecessary friction.

Step 2: Agitate Safely with the Right Tools

After the pre-soak has softened the residue, use a high-quality microfiber towel or a detailing sponge designed for paint-safe agitation. Gently wipe the surface using a straight-line motion, allowing the chemical to do the heavy lifting rather than pressing hard. For stubborn, caked-on areas, you can reapply the spray and let it dwell again before wiping. Avoid using paper towels, stiff brushes, or your fingernails, as these will scratch the clear coat and leave surface contamination that requires paint correction to fix.

Step 3: Rinse and Inspect for Residue

Once you have wiped down the affected panels, rinse the area thoroughly with clean water or a pressure washer to remove any remaining chemical and dissolved organic matter. Inspect the surface closely in good lighting, looking for faint outlines or a rough texture that indicates etching has already occurred. If you still see residue or a cloudy film, repeat the pre-soak and agitation steps before moving on to a clay bar treatment.

Clay Bar Treatment for Bug Residue and Etching

A clay bar treatment for bug residue is the definitive solution for paint that feels rough or shows faint outlines after the splatter has been removed. The clay bar is designed to safely pull embedded surface contamination, such as microscopic insect parts and industrial fallout, out of your clear coat without scratching. After washing and drying the car, spray a detailing lubricant on a small section and gently glide the flattened clay bar across the surface. You will feel the clay catching on contaminants, and as the section becomes smooth, you know the paint is clean.

This step is essential for addressing early-stage etching that has not yet penetrated the clear coat. If the clay bar treatment does not smooth out the surface, the etching is permanent and will require professional paint correction. At this point, you have done everything possible at home to remove the splatter and contamination; the remaining work involves leveling the clear coat with a machine polisher.

Common Mistakes That Scratch Your Clear Coat

The most common mistake people make is attacking dry splatter with a dry microfiber towel, which grinds the hard insect parts into the paint and creates deep scratches. Another frequent error is using household glass cleaner or WD-40, which are not formulated for automotive paint and can strip wax or leave a residue that attracts more dirt. Scrubbing in a circular motion is also problematic because it creates visible swirl marks that are noticeable under direct sunlight.

A less obvious mistake is washing the car with a sponge that has been dropped on the ground, as it picks up grit that acts like sandpaper. You should also avoid letting the bug remover dry on the paint, as this can leave chemical stains. The safest approach is to work in small sections, keep the surface lubricated, and always use a fresh, clean microfiber towel to prevent surface contamination from being dragged across your finish.

How to Prevent Bug Splatter on Car Paint

Prevention is about creating a barrier between the organic matter and your clear coat, making future cleanups significantly easier. The key to how to prevent bug splatter on car paint is maintaining a strong layer of protection, which gives you a sacrificial surface that takes the brunt of the damage. A car with no wax or sealant will allow bug residue to bond directly to the clear coat, while a protected surface allows the splatter to be wiped away with far less effort.

Wax, Sealants, and Ceramic Coatings

Traditional carnauba wax provides a warm shine but offers limited durability against harsh conditions, often lasting only a few weeks (acs.org). Synthetic paint sealants are more durable and provide a slicker surface that makes it harder for bugs to bond. Ceramic coatings are the most effective preventative measure, creating a hard, hydrophobic layer that resists chemical etching and makes baked on splatter much easier to rinse off.

For busy professionals, the maintenance schedule matters as much as the product choice. A vehicle driven daily on highways will accumulate splatter faster than a weekend car, so plan to inspect and clean the front of your vehicle weekly during peak insect seasons. If you are not comfortable applying these protectants yourself, professional detailing services offer the equipment and expertise to apply them correctly and ensure even coverage.

When to Call a Professional Detailer

You should seek professional help when you can feel deep scratches with your fingernail, see white or dull patches indicating the clear coat has been compromised, or notice that a clay bar treatment has not smoothed out the paint surface (edmunds.com). These signs point to paint damage that has gone beyond surface contamination and now requires machine polishing or paint correction to restore. Attempting to fix deep etching at home with over-the-counter compounds often makes the problem worse by creating uneven areas that are visible in the light.

Mobile detailing services offer a distinct advantage in this scenario because they bring the expertise and equipment to your location, eliminating the risk of you causing further damage with improper technique. Clean Image 101 specializes in this exact type of restoration, from expert bug removal to clay bar treatments and full paint restoration, performed by skilled professionals with years of industry experience. Our team handles everything from sports cars to minivans, tailoring the process to your vehicle’s specific finish and needs, saving you time and ensuring your car receives the tailored, professional care it deserves without disrupting your day.

Frequently Asked Questions

Will WD-40 remove bugs from car paint?

WD-40 can help soften bug splatter, but it is not the best choice for automotive paint. It leaves an oily residue that must be fully removed, and it offers no lubrication for safe agitation. Dedicated pH-balanced bug removers are designed to dissolve organic matter without stripping wax or sealants, making them safer and more effective for protecting your clear coat.

Does a clay bar help remove stubborn bug residue?

Yes, a clay bar treatment is excellent for bug residue that remains after washing. After you remove the bulk of the splatter, a clay bar with lubricant lifts embedded organic matter and surface contamination that washing misses. This restores a smooth finish and prepares the paint for wax or sealant. It will not remove heavy etching, which requires paint correction.

How can I prevent bug splatter from etching into my clear coat?

The best prevention is a sacrificial barrier. A quality wax, paint sealant, or ceramic coating makes the surface slicker, so bugs are less likely to bond, and gives you a buffer between the acidic residue and your clear coat. Quick removal within a day or two also matters. The longer organic matter sits in the sun, the faster it etches the paint.


Removing baked on bug splatter is a test of patience and technique, and knowing when to stop is just as important as knowing how to start. If your paint is etched, scratched, or you simply want to ensure the job is done safely, professional help is the most reliable route. Book professional car care with Clean Image 101 and let our mobile team restore your vehicle’s finish at your home or office, with services ranging from meticulous bug removal to complete paint restoration.

Preventing Swirl Marks During Mobile Detailing

Table of Contents

Last Updated: September 5, 2026

Why Your Mobile Detailer Keeps Leaving Swirl Marks

Swirl marks are a network of fine micro-scratches in your clear coat that catch the light and dull your finish. They appear when abrasive particles get dragged across the paint during washing or drying, and mobile detailing environments create perfect conditions for this damage.

The core problem is contamination. A single grain of sand trapped in a wash mitt acts like sandpaper, carving micro-scratches with every pass. Most marring happens not from aggressive chemicals but from friction between dirt and unprotected paint.

What separates a detailer who protects your paint from one who damages it comes down to three pillars: proper wash methodology, quality towel selection, and controlled drying.

The Two-Bucket Wash Method: Your First Defense

The two-bucket wash method is the industry standard for minimizing contamination during contact washing. One bucket holds your soapy solution while the second holds clean rinse water, often fitted with a grit guard to trap sediment. After each panel, you rinse the mitt in the clean bucket before reloading it with suds, ensuring you never drag captured grit back across the paint.

A professional detailer in a driveway dips a plush wash mitt into one bucket, then rinses it in a second bucket with a visible grit guard at the bottom, bright California sunlight reflecting off the wet paint

You need two separate buckets, a grit guard in the rinse bucket, and a high-quality wash mitt with deep pile that traps particles away from the paint. A common mistake is using a single bucket and relying on soap suds to lift dirt, which simply recirculates contaminants onto your clear coat.

Microfiber mitts with a chenille or long-loop pile are the safest choice because they hold dirt deep within the fibers rather than pressing it against the paint. Avoid sponges or brushes with stiff bristles, which concentrate pressure and increase the risk of marring on soft clear coats.

The Mobile Execution Gap: What Garage Guides Miss

Mobile detailing diverges from garage-based advice because you lack the controlled environment of a fixed shop. Three mobile-specific factors change how the method must be executed:

1. Bucket stability and contamination. On uneven pavement, buckets tip or splash, and wind-blown debris can land in your clean rinse bucket between dips. A professional setup uses buckets with sealed lids that open only for mitt entry, or positions the rinse bucket downwind of the wash zone. Some detailers use a third bucket exclusively for wheel cleaning, because brake dust contains metallic particles that will instantly mar clear coat if transferred to a body panel mitt.

2. The mitt inspection protocol between panels. The single most effective habit is inspecting the mitt face before every reload. After rinsing, spread the fibers with your thumb and look for embedded grit, hair, or plant matter. A single pine needle fragment or sand grain trapped in the pile will scratch paint on the next pass regardless of how many buckets you use. Professional detailers set aside any mitt that touches the ground and rotate to a fresh mitt after completing the lower panels, which carry the heaviest contamination load.

3. Water temperature and soap chemistry. Mobile detailers often work with water from the customer’s hose, which may be cold or inconsistent. Cold water reduces the effectiveness of many pH-neutral soaps, requiring higher concentrations to maintain adequate lubrication. A common professional practice is to use a foam cannon pre-soak with a higher dilution ratio than the label suggests, ensuring the contact wash has enough slickness to float contaminants off rather than grinding them in.

The Grit Guard Reality Check

Grit guards are effective but not a substitute for mitt maintenance. They trap sediment at the bottom of the rinse bucket but do nothing for debris embedded in the mitt fibers after rinsing. The ridges create turbulence that releases loose particles, yet stubborn contaminants like tar specks require manual removal. Run your fingers through the mitt pile after every few panels to feel for embedded debris, and switch to a clean mitt mid-wash. Most professional detailers carry at least three mitts per vehicle and rotate them based on panel zone.

Watch Out
Never use a mitt that has been dropped on the ground, even if you rinse it thoroughly first. The impact forces grit deep into the pile where it cannot be fully removed by rinsing alone. Set it aside for wheel duty or discard it.

Adapting the Method to Sunlight and Heat

Mobile work frequently happens in direct sunlight, which accelerates soap drying on the panel. If soapy water flash-dries before you rinse it, the surfactants leave a residue that increases friction on the next mitt pass. Professional detailers manage this by working in smaller sections, washing and rinsing one panel at a time rather than soaping the entire vehicle first. They also keep a spray bottle of rinse water or quick detailer nearby to re-wet any area that begins to dry.

When ambient temperatures exceed 85°F, consider switching to a rinse-less wash product diluted in your bucket instead of traditional soap. Rinse-less formulas encapsulate dirt and provide lubrication even in challenging conditions, and they eliminate the flash-drying problem entirely because they do not rely on foam to carry lubricant.

Choosing the Best Microfiber Towels for Detailing

The best microfiber towels for detailing are defined by their GSM rating and edge construction, not just the brand name. For paint contact, you want a GSM of at least 350 to 500, which provides enough plushness to absorb water and lubricant without applying excessive pressure. Higher-density towels also hold more liquid, reducing the number of passes needed across the surface.

Can a Foam Cannon prevent Swirl Marks in your paint? – Safe Car Wash

IMJOSHV – Car Detailing and Reconditioning Tips

Towel quality directly determines whether you introduce new swirl marks during drying. A cheap towel with exposed edges or rough weave can scratch paint even when the wash itself was perfect. Look for towels with a plush, non-abrasive pile and consider a dedicated drying towel with a higher GSM and waffle-weave construction that pulls water off the surface rather than pushing it around.

Watch Out
Never use household towels, terry cloth, or old t-shirts on automotive paint. Their coarse fibers and seams will leave micro-scratches that appear as swirl marks under sunlight. This single mistake undoes all the protection from a proper two-bucket wash.

Mastering Pre-Wash and Drying Techniques

A contact wash should never be your first step, because loose dirt needs to be removed before any towel or mitt touches the paint. A pre-wash stage using a foam cannon or snow foam loosens and encapsulates surface contaminants, allowing them to rinse away with a pressure washer before physical contact begins.

Drying is where most swirl marks are introduced, often because detailers rush or use improper technique. The safest approach is to use a drying aid, a spray lubricant applied to the panel before the towel makes contact. This adds a layer of slickness that lets the towel glide over the paint instead of dragging across it, minimizing friction and preventing micro-scratches.

Blotting is always safer than wiping. Press the drying towel onto the surface to absorb water, then lift it away, rather than dragging it across the panel. For larger areas, work in straight lines rather than circular motions, which are more likely to trap debris and create visible swirl patterns.

The Touchless vs. Contact Decision Framework

Most guides treat pre-wash as a single step, but professional mobile detailers make a deliberate decision before every wash: does this vehicle need a full touchless protocol, or is a contact wash with proper technique sufficient? The answer depends on contamination level and paint condition.

A touchless-only wash, foam cannon application followed by high-pressure rinse, with no mitt contact, is the right choice when the vehicle is heavily soiled with road grime, mud, or sand, or when the paint is unprotected or already showing thin clear coat. In these conditions, any contact carries unacceptable risk. The trade-off is that touchless washing alone cannot remove bonded contaminants like tree sap, tar, or bug residue; those require spot treatment with a dedicated remover before the contact wash begins.

For lightly soiled vehicles with healthy paint protection, a contact wash with a foam cannon pre-soak is safe and more effective at achieving a deep clean. The foam cannon’s role is not just to loosen dirt, it also provides a visual indicator of where you have already washed, preventing you from accidentally re-contacting a dried panel.

Book professional car care today →

Pro Tip
If you are unsure whether a vehicle needs touchless or contact wash, run your hand gently over a clean panel after the pre-rinse. If you feel grit or a rough texture, switch to a full touchless protocol or extend your pre-soak dwell time before any mitt touches the paint.

Drying Mechanics: Why Technique Beats Towel Quality

Even the highest-GSM microfiber towel will scratch paint if used with poor technique. Friction between the towel and paint increases as the towel absorbs water and becomes heavier, and any trapped particle is pressed harder against the clear coat. This is why drying aids matter more than towel brand. A spray lubricant applied before the towel makes contact creates a hydrodynamic layer that lifts the towel slightly off the paint, reducing friction and allowing trapped particles to slide rather than dig in.

Professional detailers use a two-towel drying system. The first towel, typically a waffle-weave or twisted-loop microfiber with GSM above 600, absorbs the bulk of the water. The second towel, a plush finishing towel, follows immediately to catch any remaining moisture and buff the surface to a streak-free finish. This second pass is critical because it removes the thin water film that can leave mineral deposits if allowed to air-dry.

Water Quality: The Hidden Variable in Mobile Drying

Mobile detailers face a problem that garage-based guides rarely address: the customer’s water supply. Hard water containing dissolved calcium and magnesium leaves visible mineral spots when it dries on paint, and those spots are not just cosmetic, they can etch into the clear coat over time, creating a hazy appearance that mimics swirl marks under certain lighting.

A professional mobile setup addresses this in one of two ways. The first is a portable deionization (DI) system that removes dissolved minerals before the water touches the paint, allowing spot-free air drying. The second is a drying aid with chelating agents that bind to minerals and prevent them from depositing as the water evaporates. Both approaches work, but they require different drying techniques. With a DI system, you can safely allow water to sheet off and use a blower to remove remaining droplets. Without DI, you must dry each panel immediately after rinsing, before water has a chance to evaporate and leave mineral residue.

The Blower Advantage for Mobile Work

A handheld or backpack blower is one of the most underrated tools for preventing swirl marks in mobile detailing. After the final rinse, a blower removes water from crevices, mirrors, emblems, and panel gaps where towels cannot reach without risk of catching an edge. This eliminates the need to drag a towel across tight areas, which is where most drying-induced marring occurs. Professional detailers use the blower first to remove bulk water, then follow with a drying aid and towel only on large flat panels where the blower is less efficient.

Environmental Timing for Outdoor Drying

The drying phase is the most vulnerable moment in a mobile detail because the paint is wet, unprotected, and exposed to the environment. Wind-blown dust, pollen, and tree sap can settle on a panel in the seconds between rinsing and drying. Professional mobile detailers minimize this window by drying in the same order they washed, starting at the top and working down, and by keeping a spray bottle of rinse water handy to re-wet any panel where contaminants land before the towel arrives. If the wind picks up significantly mid-detail, the safest move is to pause the drying process, re-rinse the affected panels, and resume only when conditions settle.

Mobile-Specific Factors: Water Quality and Environment

Mobile detailing introduces variables that a fixed shop never faces, and water quality is the most overlooked. Hard water containing dissolved minerals leaves deposits that etch into the clear coat if allowed to dry, creating spots that look like swirl marks under certain lighting. A mobile detailer should carry a water filtration or deionization system to ensure spot-free rinsing, or use a drying aid that neutralizes mineral content before it sets.

Environmental control is the second challenge. Working outdoors means dealing with wind-blown dust, pollen, and tree sap that can settle on panels between wash stages. A professional mobile setup accounts for this with faster work sequences and by keeping panels wet until the final drying pass, minimizing the window where contaminants can land on bare paint.

Tool maintenance and inspection matter even more on the road. Wash mitts and towels that are dropped on the ground must be set aside immediately, as they pick up grit that will scratch paint on the next pass. A detailer should inspect their media regularly for embedded debris and replace worn towels before they become a hazard to your automotive finish.

How to Remove Swirl Marks from Car Paint

If swirl marks are already present, washing technique alone will not fix them; the damaged clear coat requires paint correction. How to remove swirl marks from car paint typically involves a machine polisher with a cutting compound that levels the clear coat, removing the thin layer of paint that contains the micro-scratches. This is a precision process that requires the right pad, compound, and technique to avoid burning through the clear coat.

Pro Tip
Before attempting any paint correction, verify the clear coat thickness with a paint depth gauge. If the coating is already thin from previous polishing, aggressive correction is risky and a lighter approach or ceramic coating may be the safer path.

For light swirl marks, a single-stage polish with a fine compound may be sufficient. Deeper scratches from years of improper washing may require a two-stage process: a cutting compound to remove the defect, followed by a finishing polish to restore gloss and remove haze left by the cutting pad. After correction, the paint should be protected with a sealant or ceramic coating to reduce future contamination and make washing safer.

Maintaining a Swirl-Free Finish Between Details

Your habits between professional details determine how long the paint stays swirl-free. The most effective maintenance is a rinse-less or waterless wash product designed for light dust and bird droppings, which lubricates the surface enough to safely lift contaminants without a full wash setup. These products are ideal for busy owners who need to freshen the car between scheduled details.

Automatic car washes are the fastest way to reintroduce swirl marks (popularmechanics.com). The nylon brushes and shared towels used by tunnel washes trap grit from thousands of vehicles and drag it across your paint. Even touchless washes that rely on high-pressure chemicals can strip your wax or sealant, leaving the clear coat more vulnerable to future marring.

A simple inspection routine helps you catch problems early. Check the paint under direct sunlight or a bright LED light for new micro-scratches after each wash. If you notice a haze developing, it is time to book a professional correction rather than letting the damage compound. A ceramic coating applied by a professional adds a sacrificial layer that resists scratching and makes routine washing far safer for the underlying clear coat (autogeek.net).

Maintenance Task Recommended Frequency Primary Benefit
Rinse-less wash with lubricant Weekly or as needed Removes light dust without paint marring
Full two-bucket contact wash Every 2-4 weeks Deep cleaning with minimal swirl risk
Professional detail and inspection Every 3-6 months Removes embedded contaminants and corrects early damage

Conclusion: Book Professional Car Care Today

Keeping a flawless finish requires consistency, and the margin for error is small when you are working with soft clear coats and abrasive environments. The techniques above protect your paint between professional appointments, but they demand time, the right products, and disciplined execution every single wash.

That is where Clean Image 101 earns its place. Our mobile service brings skilled professionals to your driveway with the correct two-bucket setup and high-GSM microfiber towels, so your paint never meets a contaminated mitt. From sports cars to minivans, we tailor our process to your vehicle’s specific finish, handling everything from bug removal to full paint restoration without you lifting a finger.

Get started with Clean Image 101 and let our team handle the swirl-free maintenance your car deserves, right at your home or office.

Frequently Asked Questions

Does a ceramic coating prevent swirl marks?

A ceramic coating adds a sacrificial layer of protection, making the surface slicker and more resistant to minor abrasions. It helps reduce the risk of micro-scratches, but it does not make the paint immune. Swirl marks can still occur if you use improper washing techniques, dirty towels, or automatic car washes. The coating protects the clear coat, not from it. Proper maintenance is still essential.

What is the two-bucket method for washing cars?

The two-bucket method uses one bucket for soapy water and a second for clean rinse water. After a few swipes on the paint, you rinse your wash mitt in the clean bucket. This action releases trapped dirt particles into the rinse bucket instead of back onto your paint. A grit guard in the rinse bucket further traps contaminants. This simple habit dramatically reduces the chance of creating new swirl marks.

Can detailing remove swirl marks?

Yes. Swirl marks are micro-scratches in the clear coat. Professional paint correction uses a machine polisher with an abrasive compound to level the clear coat and remove the scratches. Light swirl marks may be removed with a fine polish, while deeper ones require a more aggressive cutting compound. This process is best left to professionals, as using too much pressure or the wrong pad can damage the paint.

How do I know my detailer won’t scratch my paint?

Ask about their process. A professional detailer should discuss their approach, including the type of wash mitts, the two-bucket method, and the condition of their microfiber towels. Inquire if they use grit guards and how often they replace their towels. A reputable detailer will be transparent about their techniques to protect your vehicle’s finish and will use fresh, clean equipment for each job.

TEXT US BOOK ONLINE