Paint Correction vs Standard Car Wax: Which Protects Better
Table of Contents
- Paint Correction vs Standard Car Wax: Key Differences
- How Long Does Paint Correction Last vs Wax Protection
- Paint Correction Process: Removing Swirl Marks and Imperfections
- Waxing Process: Protection and Gloss Enhancement
- Benefits of Professional Paint Correction
- DIY Paint Correction Tools vs Professional Equipment
- Paint Correction and Wax: Comparison Table and Decision Framework
- Frequently Asked Questions
Last Updated: September 1, 2026
Paint Correction vs Standard Car Wax: Key Differences
Paint correction and standard car wax serve fundamentally different purposes. Paint correction removes paint imperfections through mechanical abrasion using compounds, polishes, and specialized equipment. It addresses damage already in the clear coat: swirl marks, fine scratches, water spots, and oxidation. Correction restores paint to its original condition but doesn’t add protection.
Standard car wax is a protective coating applied to clean paint. It creates a barrier against environmental contaminants, UV rays, and moisture, enhancing gloss and providing hydrophobic properties. However, wax cannot remove existing imperfections, if swirl marks are present, wax will make them more visible under certain lighting.
The critical difference: correction is remedial; wax is preventative. You cannot wax your way out of paint damage, and you cannot protect with correction alone.
What Paint Correction Does
Paint correction eliminates surface and subsurface defects by breaking down the clear coat layer microscopically, then rebuilding it to a smooth, flawless finish. A compound containing abrasive particles removes the damaged top layer, exposing fresh, undamaged clear coat beneath. This process requires skill, aggressive polishing can thin the clear coat dangerously if done incorrectly.
The process targets swirl marks from automated car washes or improper hand washing, light to moderate scratches, holograms, water spots, oxidation, and paint overspray. Professional correction uses orbital polishers, specialized compounds with sub-micron abrasives, and multiple polishing stages to achieve a mirror-like finish.
Paint correction is not permanent protection. Once corrected, the paint remains vulnerable to new damage, which is why protection afterward through wax, sealant, or ceramic coating is essential.
What Standard Car Wax Does
Standard car wax forms a thin protective layer on the clear coat. Carnauba wax provides a warm, deep shine and decent water beading for 4-8 weeks depending on driving conditions. Synthetic waxes last longer (8-12 weeks) and offer stronger hydrophobic properties (sae.org).
Wax shields the clear coat from UV rays, road salt, bird droppings, tree sap, and industrial fallout. It enhances gloss by filling microscopic surface irregularities and provides water-beading properties that help water sheet off rather than pooling.
What wax does not do: it cannot fill deep scratches, remove swirl marks, or restore oxidized paint. If your car has visible paint imperfections, applying wax is like putting fresh paint on a damaged wall, the damage remains, just shinier.
How Long Does Paint Correction Last vs Wax Protection
Paint correction results are permanent, the damage is physically removed, not covered. Once a swirl mark is polished away, it stays gone unless new damage occurs. However, the protection that follows correction is temporary. The corrected paint remains vulnerable to new scratches, oxidation, and contamination.
Wax protection typically lasts 4-12 weeks depending on product type, driving conditions, weather exposure, and washing frequency. Each wash removes a thin layer of wax, shortening the protection window. Most waxes require reapplication every 6-8 weeks for optimal protection (nhtsa.gov). Synthetic sealants extend this to 12-16 weeks.
The practical timeline: if you correct your paint in spring, apply wax or sealant immediately. By summer’s end (8-10 weeks), that protection has degraded significantly. A second application in late summer ensures protection through fall and early winter. This is why professional detailers often recommend correction plus protection as a bundled service.
Paint Correction Process: Removing Swirl Marks and Imperfections
Professional paint correction follows a structured sequence designed to remove defects progressively without over-working the clear coat. The process typically takes 4-8 hours for a full vehicle.
Surface Decontamination and Clay Bar Treatment
Before any polishing begins, the paint must be thoroughly cleaned of bonded contaminants. Washing alone removes loose dirt, but fallout, industrial particles, brake dust, and overspray bond chemically to the clear coat. These particles will scratch the paint if you attempt to polish over them.
A clay bar treatment removes these bonded contaminants by working gently across the paint surface in a lubricating solution. The clay’s sticky texture lifts embedded particles without scratching. You’ll feel the paint transform from slightly rough to glass-smooth as you work. This step is non-negotiable for paint correction. After clay bar treatment, the paint is rinsed thoroughly and dried, ready for correction work.
Compound and Polishing Steps
Actual correction involves multiple stages, each using progressively finer abrasives. A heavy compound removes the majority of defects: swirl marks, light scratches, and oxidation. This stage is aggressive and removes clear coat material, so it’s applied selectively to affected areas.
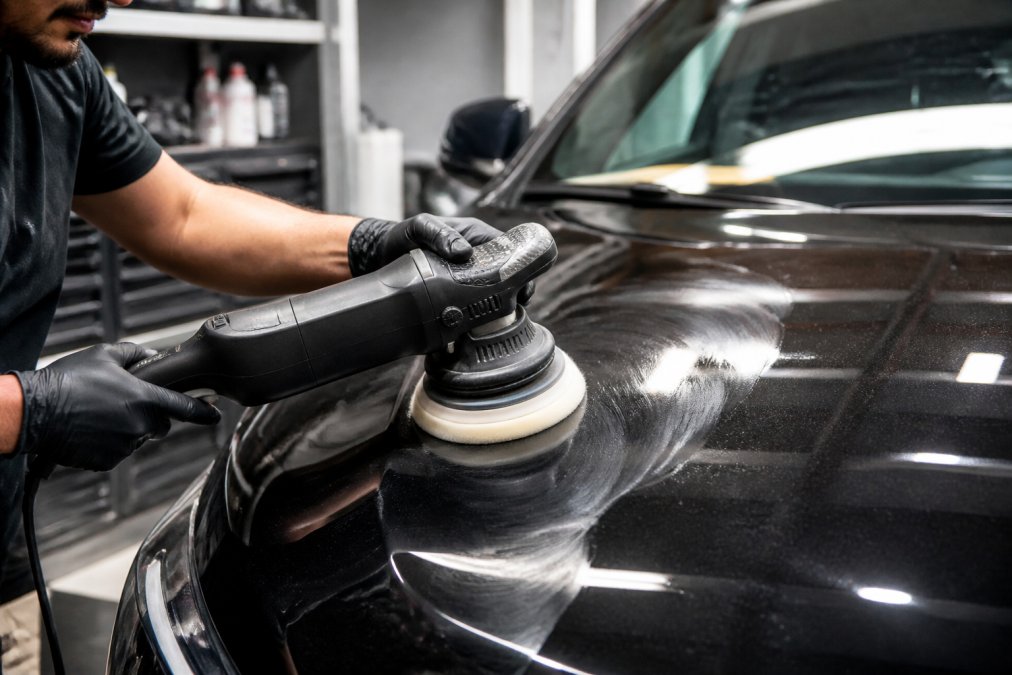
After compound work, a medium polish refines the finish and removes compound holograms. Finally, a finishing polish creates mirror-like clarity and depth. Each stage uses different pad types and machine speeds to avoid over-working the paint.
The result is paint that’s not just clean but restored. Swirl marks vanish, scratches disappear, and the clear coat is now flawless, though slightly thinner than originally.
Waxing Process: Protection and Gloss Enhancement
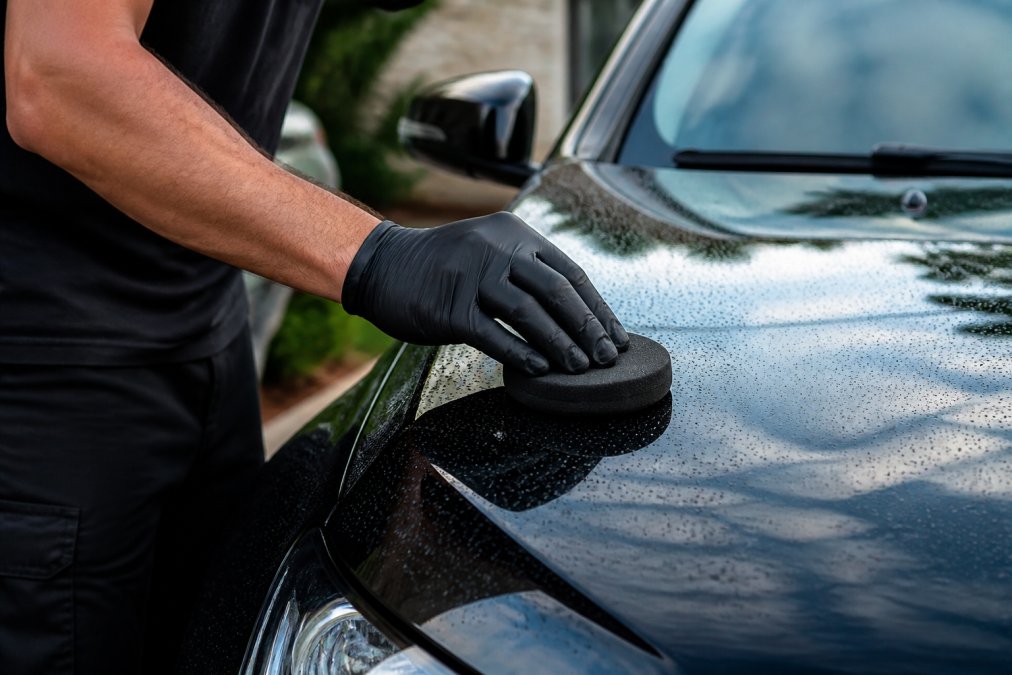
Waxing is straightforward compared to correction. Most liquid waxes are applied with a foam applicator pad in small circular motions, covering roughly 2 feet by 2 feet sections before buffing off with a microfiber towel. The wax should dry to a haze before buffing, typically 2-5 minutes depending on temperature and humidity.
The entire process takes 45-90 minutes for a full vehicle. Paste waxes take longer because they require more buffing, while liquid waxes are faster. Proper application produces an even gloss with no streaking or residue. This is why many car owners prefer professional waxing, results are more consistent and protection more reliable.
Book professional car care today →
Benefits of Professional Paint Correction
Professional paint correction offers several advantages over DIY attempts. First, professionals use equipment and compounds unavailable to consumers. An orbital polisher like the RUPES LHR 15 Mark III costs $455-500 and requires training to use safely (osha.gov).
Second, professionals assess paint thickness before and after correction using a paint depth gauge, preventing over-polishing that can burn through the clear coat. Third, they understand how different paint types respond to correction and adjust their approach accordingly.
Fourth, professionals recognize when correction alone isn’t enough and recommend alternatives like spot correction or ceramic coating. Finally, professional results are visually superior, no holograms, buffing marks, or residual swirl marks. The paint appears deeper, more lustrous, and more three-dimensional.
DIY Paint Correction Tools vs Professional Equipment
Consumer orbital polishers cost $60-150 and operate at fixed speeds (typically 4,000-6,000 orbits per minute). Professional random orbital polishers like the RUPES LHR 15 Mark III operate at variable speeds (1,200-9,000 orbits per minute) with electronic feedback that maintains consistent speed under load.
Consumer compounds cut slower, requiring more applications to achieve the same defect removal. Professional compounds contain finer abrasives that break down more effectively under machine pressure.
Paint depth gauges are essential for safe correction but rarely used by DIY enthusiasts. A basic digital gauge costs $30-50, but many consumers skip this step, risking clear coat damage.
The reality: DIY correction is possible for minor swirl marks and light oxidation, but full paint correction is best left to professionals. The risk of damage, burning through the clear coat, or creating holograms is high. Many car owners who attempt DIY correction end up paying professionals to fix the damage, ultimately spending more than professional correction would have cost initially.
Paint Correction and Wax: Comparison Table and Decision Framework
| Aspect | Paint Correction | Standard Car Wax |
|---|---|---|
| Purpose | Remove existing paint defects | Protect and enhance appearance |
| What It Fixes | Swirl marks, scratches, oxidation, water spots | None, only prevents new damage |
| How It Works | Abrasive removal of damaged clear coat | Creates protective barrier on surface |
| Duration | Permanent (defects stay removed) | Temporary (4-12 weeks) |
| Cost Range | $300-1,200+ (professional) | $20-50 (product) or $100-300 (service) |
| DIY Difficulty | High (risk of damage) | Low (straightforward application) |
| Professional Time | 4-8 hours | 45-90 minutes |
| Maintenance Required | Reapply wax after correction | Reapply every 6-8 weeks |
| Best For | Paint with visible damage | Protecting already-clean paint |
| Skill Required | High (professional) | Low (consumer) |
When to Choose Paint Correction
Paint correction is the right choice when your vehicle’s paint has visible defects that wax cannot address. Swirl marks from improper washing, fine scratches from parking lot incidents, oxidation from sun exposure, or water spots all require correction.
Examine your paint under bright light. If you see circular patterns, fine scratches, or dull patches, correction is necessary. Paint correction is also the right choice if you’re preparing a vehicle for long-term protection with a durable ceramic coating or professional-grade sealant. If you’ve recently purchased a used vehicle and want to restore its finish to near-original condition, correction is essential.
When to Choose Waxing
Waxing is the right choice when your paint is already in good condition, free of swirl marks, scratches, and oxidation. If your vehicle is relatively new or well-maintained, wax provides cost-effective protection without the need for correction.
Waxing is also appropriate as ongoing maintenance after correction. Once you’ve invested in professional correction, regular waxing every 6-8 weeks maintains the corrected finish and prevents new damage. For budget-conscious owners, waxing alone is practical. Waxing is also logical for vehicles in storage or low-use situations, preventing oxidation and contamination during idle periods.
Combining Both for Maximum Paint Health
The most effective approach combines both strategies: correction followed by ongoing wax protection. This creates a comprehensive paint care system that addresses both existing damage and future protection.
Have your paint professionally corrected to remove all existing defects and restore the finish to near-original condition. Immediately after correction (within 24 hours), apply a protective wax or sealant. Then maintain that protection with regular waxing every 6-8 weeks.
This approach is particularly valuable for luxury vehicles or cars you plan to keep long-term. The initial correction investment is significant, but the results are dramatic. Regular waxing then preserves that corrected finish, preventing the accumulation of new swirl marks and defects.
Clean Image 101 offers comprehensive services for paint care. Our professionals assess your paint condition, recommend whether correction is necessary, and apply appropriate protection afterward. For vehicles with significant paint damage, we perform full correction using professional-grade equipment and compounds. For well-maintained vehicles, we apply protective wax to enhance and preserve the existing finish.
The choice between paint correction and standard car wax depends on your paint’s current condition and your long-term goals. If you’re seeing swirl marks, scratches, or oxidation, correction is necessary, wax alone won’t solve the problem. If your paint is already clean and you want to protect it, wax is the practical choice. For maximum results, combine both: correct the damage first, then maintain with regular waxing. Contact Clean Image 101 to assess your vehicle’s paint condition and determine whether correction, waxing, or both will best preserve your car’s appearance and value.
Frequently Asked Questions
Q: Is paint correction the same as waxing?
A: No. Paint correction removes swirl marks, scratches, and oxidation from your clear coat using compounds and polishing. Waxing applies a protective layer on top of the paint to enhance gloss and provide hydrophobic properties. Correction fixes existing damage; waxing protects against future damage. Many professionals recommend correction first, then waxing for optimal paint health.
Q: How long does paint correction last compared to car wax?
A: Paint correction results are permanent because it physically removes defects from the clear coat surface. Wax protection typically lasts 3-6 months depending on the product and driving conditions. Carnauba wax lasts shorter; synthetic sealants last longer. After correction, you’ll need regular waxing to maintain protection and gloss. The correction itself won’t fade, but your paint will need ongoing maintenance.
Q: What are the main benefits of professional paint correction?
A: Professional paint correction restores your clear coat to near-original condition, removing swirl marks, light scratches, and oxidation that DIY methods can’t address. It enhances gloss, improves light reflection, and prepares the surface for maximum wax adhesion. For luxury vehicles or older cars with accumulated damage, professional correction delivers results that standard waxing cannot achieve and protects your long-term paint integrity.
Q: Can I do paint correction myself with DIY tools?
A: Basic DIY paint correction tools like handheld polishers and consumer-grade compounds can address minor swirl marks, but professional equipment like random orbital polishers delivers superior results. DIY requires skill to avoid damaging the clear coat or creating holograms. Professional detailers use paint depth gauges to measure clear coat thickness and adjust technique accordingly. For significant defects or high-end vehicles, professional correction is safer and more effective.
This article was written using GrandRanker
Comments are closed.