Protect Leather Car Seats From Cracking: 7-Step Guide
Table of Contents
- Why Leather Car Seats Crack and How to Prevent It
- Step 1: Clean Your Leather Seats Regularly
- Step 2: How to Condition Leather Car Seats
- Step 3: How Often to Condition Leather Seats
- Step 4: How to Protect Leather Seats From Sun Damage
- Step 5: Choose the Best Leather Conditioner for Car Seats
- Common Mistakes to Avoid When Protecting Leather Seats
- When to Seek Professional Repair
- Frequently Asked Questions
Last Updated: October 10, 2026
Why Leather Car Seats Crack and How to Prevent It
Leather car seats crack due to heat, sunlight, and moisture loss. To protect leather car seats requires consistent maintenance, but most damage is preventable with a simple routine.
Leather needs moisture to stay flexible. UV rays and heat dry it out, causing loss of elasticity. Friction from daily use then spreads surface damage into deeper cracks. Prevention requires three steps: regular cleaning, consistent conditioning, and sun protection.
Step 1: Clean Your Leather Seats Regularly
Cleaning is the foundation of leather protection. Dirt, dust, oils, and debris accumulate on the surface and work into the leather’s pores, trapping moisture and accelerating cracking. Adjust frequency based on your climate and driving habits.
How Often to Clean Based on Use and Climate
High-use vehicles in hot, sunny climates, Clean every 2-3 weeks. Heat and UV exposure open the leather’s pores, allowing dirt to penetrate deeper. Frequent cleaning prevents buildup that becomes harder to remove.
Moderate-use vehicles in temperate climates, Clean monthly. This is the baseline for most owners and prevents visible dirt accumulation without over-cleaning.
Low-use vehicles or those parked in garages, Clean every 4-6 weeks. Less exposure to sun and heat means slower dirt accumulation. However, do not skip cleaning entirely; indoor dust and skin oils still settle on seats.
Winter months in cold climates, Clean every 4-6 weeks. Lower temperatures slow dirt penetration, but salt residue can accelerate corrosion, so don’t skip cleaning if you drive in salted conditions.
Signs Your Leather Needs Cleaning Sooner
Do not wait for a calendar reminder if your seats show these warning signs:
- Visible dust or debris on the surface, especially in creases and seams
- Dull appearance instead of a natural sheen (indicates surface buildup)
- Sticky or tacky feel from accumulated oils and residue
- Discoloration or dark spots that may indicate mold, mildew, or embedded dirt
- Odor from bacteria or moisture trapped in the leather
If you notice any of these, clean immediately rather than waiting for your scheduled cleaning date.
The Correct Cleaning Sequence and Technique
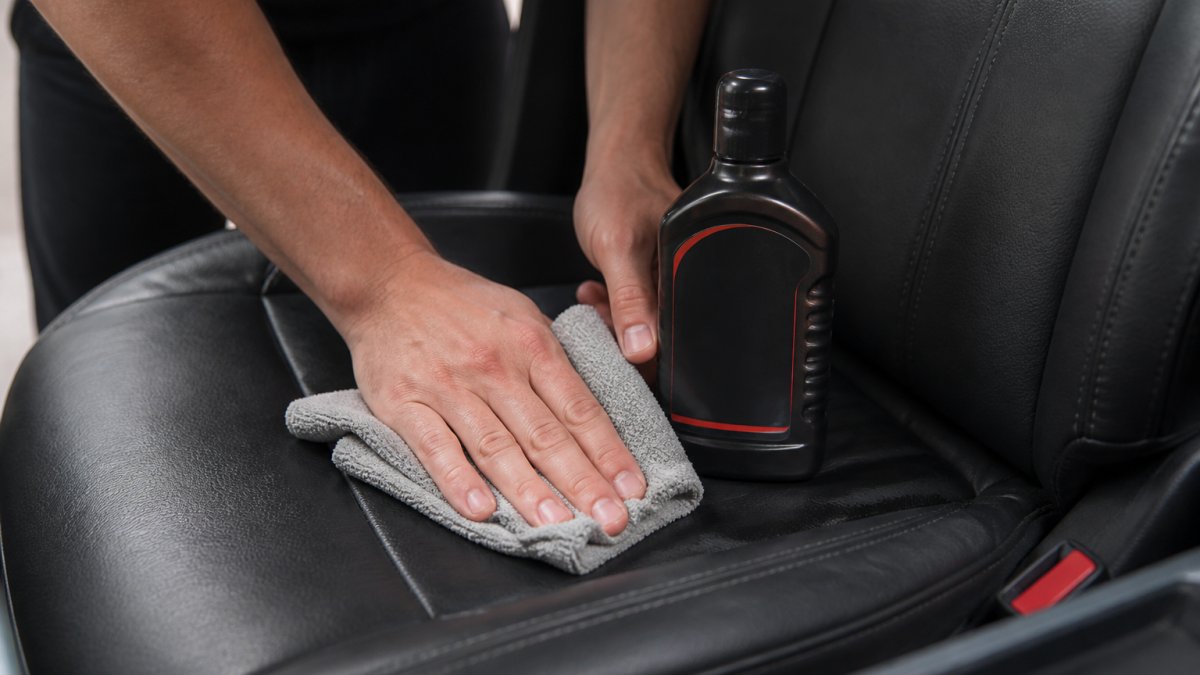
Step 1: Vacuum first, Use a soft brush attachment on your vacuum to remove loose dust and debris. This prevents you from grinding dirt into the leather when you apply cleaner.
Step 2: Choose the right cleaner, Use a pH-balanced leather cleaner specifically formulated for automotive upholstery. Avoid all-purpose cleaners, dish soap, or furniture cleaners; they strip natural oils and can damage the leather’s finish.
Step 3: Apply cleaner to cloth, not directly to leather, Pour cleaner onto a soft microfiber cloth; don’t spray directly onto the seat. Excess liquid can seep into the leather and cause warping or mold.
Step 4: Clean with gentle circular motions, Work cleaner into the leather using small, circular motions. Don’t scrub back-and-forth, as this creates micro-tears that develop into cracks. Use light to medium pressure.
Step 5: Pay special attention to seams and creases, Dirt accumulates in these areas and is harder to remove once embedded. Use a soft brush (an old toothbrush works well) to gently work cleaner into seams. Follow with a damp cloth to remove residue.
Step 6: Rinse with a barely damp cloth, Wipe the seat with a cloth dampened with distilled water to remove cleaner residue, which attracts dust if left behind.
Step 7: Dry thoroughly, Use a dry microfiber cloth to remove excess moisture. Allow the seat to air-dry completely before using the vehicle. Damp leather is more prone to mold and mildew, especially in humid climates.
What to Avoid During Cleaning
Excessive water, Soaking leather causes uneven moisture absorption, leading to warping, discoloration, and cracking. Use a damp cloth only.
Harsh chemicals, Acetone, mineral spirits, bleach, and strong alcohols strip oils and damage the finish. Repeated harsh cleaning weakens the surface and accelerates cracking.
Abrasive cloths or brushes, Rough fabrics, stiff brushes, or scouring pads create micro-damage that spreads into visible cracks over time. Always use soft microfiber cloths and soft-bristled brushes.
Leaving cleaner residue, Incomplete rinsing leaves a film that attracts dust. Always follow up with a damp cloth and dry thoroughly.
Cleaning is not a one-time task but part of a continuous cycle: clean → condition → protect → repeat. Skipping or delaying cleaning allows dirt to embed deeper, making future conditioning less effective and increasing the risk of cracking.
Step 2: How to Condition Leather Car Seats
Conditioning replaces natural oils that leather loses through heat and sun exposure, keeping it soft and resistant to cracking. Apply a leather conditioner every three months using a small amount on a clean cloth with gentle circular motions. Let it absorb 10-15 minutes, then wipe excess away. Choose a conditioner made for automotive leather with natural oils; avoid silicone-based products that build up and make seats slippery. This step is essential to protect leather car seats from cracking.
Step 3: How Often to Condition Leather Seats
The frequency depends on your climate and driving habits. In hot, sunny climates, condition every two months. In moderate climates, every three months is sufficient. If you park in a garage most of the time, you can stretch it to four months.
Signs your leather needs conditioning sooner:
- The surface feels dry or stiff to the touch
- You notice early signs of fading in color
- The leather appears dull instead of having a natural sheen
In winter or cooler months, you can reduce conditioning to every four months since UV exposure is lower and temperatures are milder. However, don’t skip conditioning entirely during winter, indoor heating dries out leather just as much as summer sun does.
Consistency matters more than frequency. A regular three-month schedule beats sporadic deep conditioning. Your leather responds better to steady maintenance than to neglect followed by intensive treatment.
Step 4: How to Protect Leather Seats From Sun Damage
UV rays break down leather’s molecular structure, causing fading, dryness, and cracking. Use a reflective sunshade every time you park, it reduces interior temperature by 20-30 degrees and slows UV damage. Park in shade when possible; consider window tinting if you regularly park in direct sun. Apply UV-protective leather dressing after conditioning. Layer these defenses: sunshade, parking location, window protection, and regular conditioning.
Book professional car care today →
Step 5: Choose the Best Leather Conditioner for Car Seats
Not all leather conditioners are equal, and choosing the wrong product can accelerate cracking rather than prevent it. The best option depends on your leather type, climate, and the specific ingredients in the product.
Identify Your Leather Type First
Before selecting a conditioner, determine what type of upholstery you have. Most car seats fall into three categories:
Genuine Leather, Full-grain or top-grain leather that breathes and absorbs conditioner. Check your door jamb or owner’s manual; genuine leather is marked “leather” without qualification.
Coated Leather, Leather with a protective polyurethane or acrylic coating that reduces breathability. It’s more stain-resistant but can crack if the coating flexes unevenly. Check your manual for “leather with protective coating.”
Synthetic Upholstery, Polyurethane or vinyl that doesn’t absorb conditioner like genuine leather. Genuine-leather products leave greasy residue on synthetic. Your manual identifies this as “leather-like” or by brand name.
What to Look For in a Quality Conditioner
Once you know your leather type, evaluate the product itself:
Natural oils over silicone, Lanolin, jojoba oil, and beeswax-based conditioners penetrate leather and restore flexibility. Silicone-based products (dimethicone, cyclomethicone) create slippery surfaces and worsen dust attraction.
pH balance suited to leather, Leather is slightly acidic (pH 4.5-5.5). Conditioners formulated for this range won’t strip oils or cause brittleness. Avoid alkaline products; they open pores and allow moisture to escape.
UV protection without heavy residue, Look for products that include UV absorbers (often listed as “avobenzone” or “titanium dioxide”) but do not rely on thick oils to provide protection. The best products absorb into the leather rather than sitting on top.
Automotive-specific formulation, Car leather experiences temperature swings, humidity changes, and intense UV exposure that furniture leather does not. Products labeled “for automotive leather” account for these stresses. Furniture conditioners are not designed for this environment.
Ingredients to Avoid
Harsh solvents, Acetone, mineral spirits, and strong alcohols strip oils and can damage the leather’s finish. These are sometimes found in cheap multi-purpose cleaners. Check the label; if you see these listed in the first five ingredients, avoid the product.
Petroleum distillates, These can soften the leather excessively and leave a sticky residue that attracts dirt. They are common in budget products.
Wax-heavy formulas, Wax builds up and cracks when leather flexes. It also traps moisture underneath, leading to mold or mildew in humid climates.
Dyes or pigments, Some conditioners include color additives to darken faded leather. These can stain clothing and may not match your seat color exactly. Unless your seats are severely faded, avoid products with added pigment.
Testing and Application Strategy
Before applying any new conditioner to your entire interior, test it on a small, inconspicuous area, the underside of a seat cushion or a corner of the back seat. Apply a small amount, let it absorb for 15 minutes, and check for:
- Greasy residue or sticky feel
- Color change or darkening
- Slipperiness when dry
- Dust attraction after 24 hours
If the test area looks and feels good, proceed with full application. If you notice excessive residue, slipperiness, or darkening, the product is not suitable for your leather type.
Read reviews from owners of the same vehicle model and climate as yours. A conditioner that works well in a dry climate may leave residue in a humid one. Peer experience is often more reliable than marketing claims.
Common Mistakes to Avoid When Protecting Leather Seats
Start maintenance before cracks appear, prevention is cheaper than repair. Don’t use excessive water; a damp cloth is sufficient. Avoid leaving windows partially open on hot days, as this creates a greenhouse effect. Never skip winter conditioning; indoor heating dries leather as much as summer heat. Don’t over-apply conditioner; excess attracts dust and creates buildup.
Using harsh chemicals or abrasive cloths is a common mistake that causes micro-damage. Even if cracks don’t appear immediately, repeated harsh cleaning weakens the leather’s surface and accelerates eventual cracking.
When to Seek Professional Repair
Deep cracks wider than 1/8 inch or through the full thickness require professional repair. Professional techniques include stitching, patching, or refinishing. Catching damage early keeps costs manageable.
At Clean Image 101, our skilled professionals understand that different leather types and vehicle conditions require tailored care, not a one-size-fits-all approach.
Regular maintenance prevents the need for expensive professional repair. Most leather damage is avoidable with the simple routine we’ve outlined: monthly cleaning, quarterly conditioning, sun protection, and consistent care year-round.
Protecting leather car seats from cracking comes down to consistent maintenance and prevention. Your vehicle’s interior deserves the same attention you give to its exterior. Clean Image 101 brings professional-grade leather care directly to your location, combining expert knowledge with convenient mobile service. Our team handles everything from deep cleaning to protective conditioning, ensuring your leather seats stay in pristine condition. Book professional car care today and keep your investment protected for years to come.
Frequently Asked Questions
How often should you condition leather car seats?
Condition leather car seats every 3-6 months if you use your vehicle daily or park outdoors regularly. If your car stays garaged and sees light use, conditioning twice yearly is sufficient. High-heat climates or intense sun exposure may require more frequent conditioning to maintain suppleness and prevent cracking. Check your leather’s appearance: if it looks dull or feels stiff, it’s time to condition.
What is the best leather conditioner for car seats?
Look for pH-balanced, water-based leather conditioners specifically formulated for automotive upholstery. Avoid silicone-heavy products that leave greasy residue. Choose conditioners that penetrate deeply rather than sitting on the surface. Always test any new product on a small, hidden area first to ensure compatibility with your specific leather type.
Can sunlight cause leather car seats to crack?
Yes, UV exposure is a primary cause of leather cracking and fading. UVA and UVB rays break down the leather’s natural oils and collagen fibers, causing dryness and loss of elasticity. Over time, this leads to surface damage, discoloration, and eventually cracking. Parking in shade, using sunshades, and applying UV-protective products significantly reduce this risk. Even brief daily exposure adds up over months and years.
Can you use household cleaners on leather car seats?
No. Household cleaners like vinegar, bleach, and all-purpose sprays are too harsh and can damage leather’s protective coating, cause discoloration, and strip natural oils. These products may also leave residue that attracts dirt. Always use leather-specific cleaners formulated for automotive upholstery. They’re pH-balanced to clean without harming the material. When in doubt, consult your vehicle’s manual or a professional detailer for approved product recommendations.
Comments are closed.